Thursday, March 5, 2015

3D Printing and Clay... a great combination!

Last spring, Nancy Preston and I were inspired by Josh Burker's Blog Post about 3D printing and clay tiles. With Tom Sharpe looking for an opportunity to add 3D printers to the Holmes Lab, we now had an excellent project to motivate those purchases. Nancy envisioned having the boys make their own clay containers, imprinted using their personally-designed stamp. Now that we have made it through the project, Nancy and I are thrilled with the results. You can see the boys' containers displayed in the cabinet between the science labs as well as upstairs outside the Centre for Learning.

One of the best parts of this venture was that the boys were using the 3D design and print process to create a tool to use to enhance their art. The plastic stamp was NOT the final product, but a necessary step in the artistic process. 


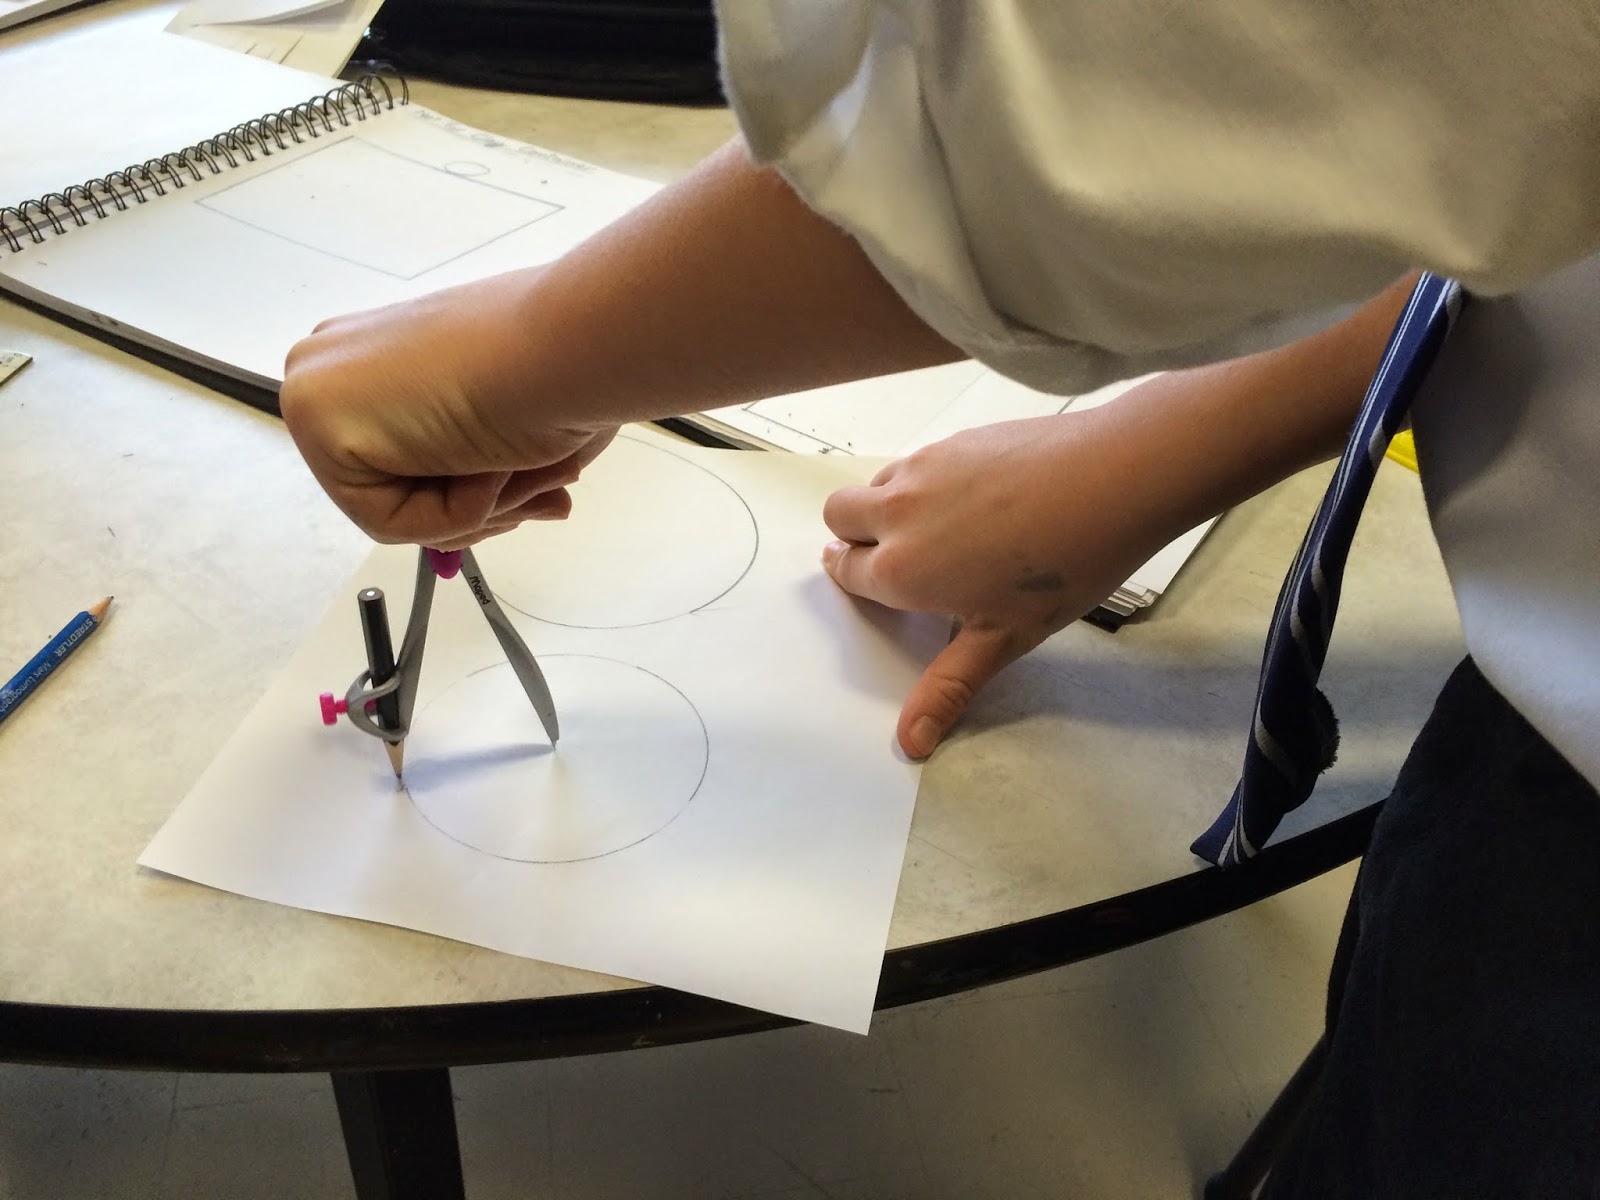
The project began with each class being assigned and researching different design styles - Native Canadian, natural, geometric or patterns. The boys drew several possible designs in their sketchbooks and provided feedback to one another. 


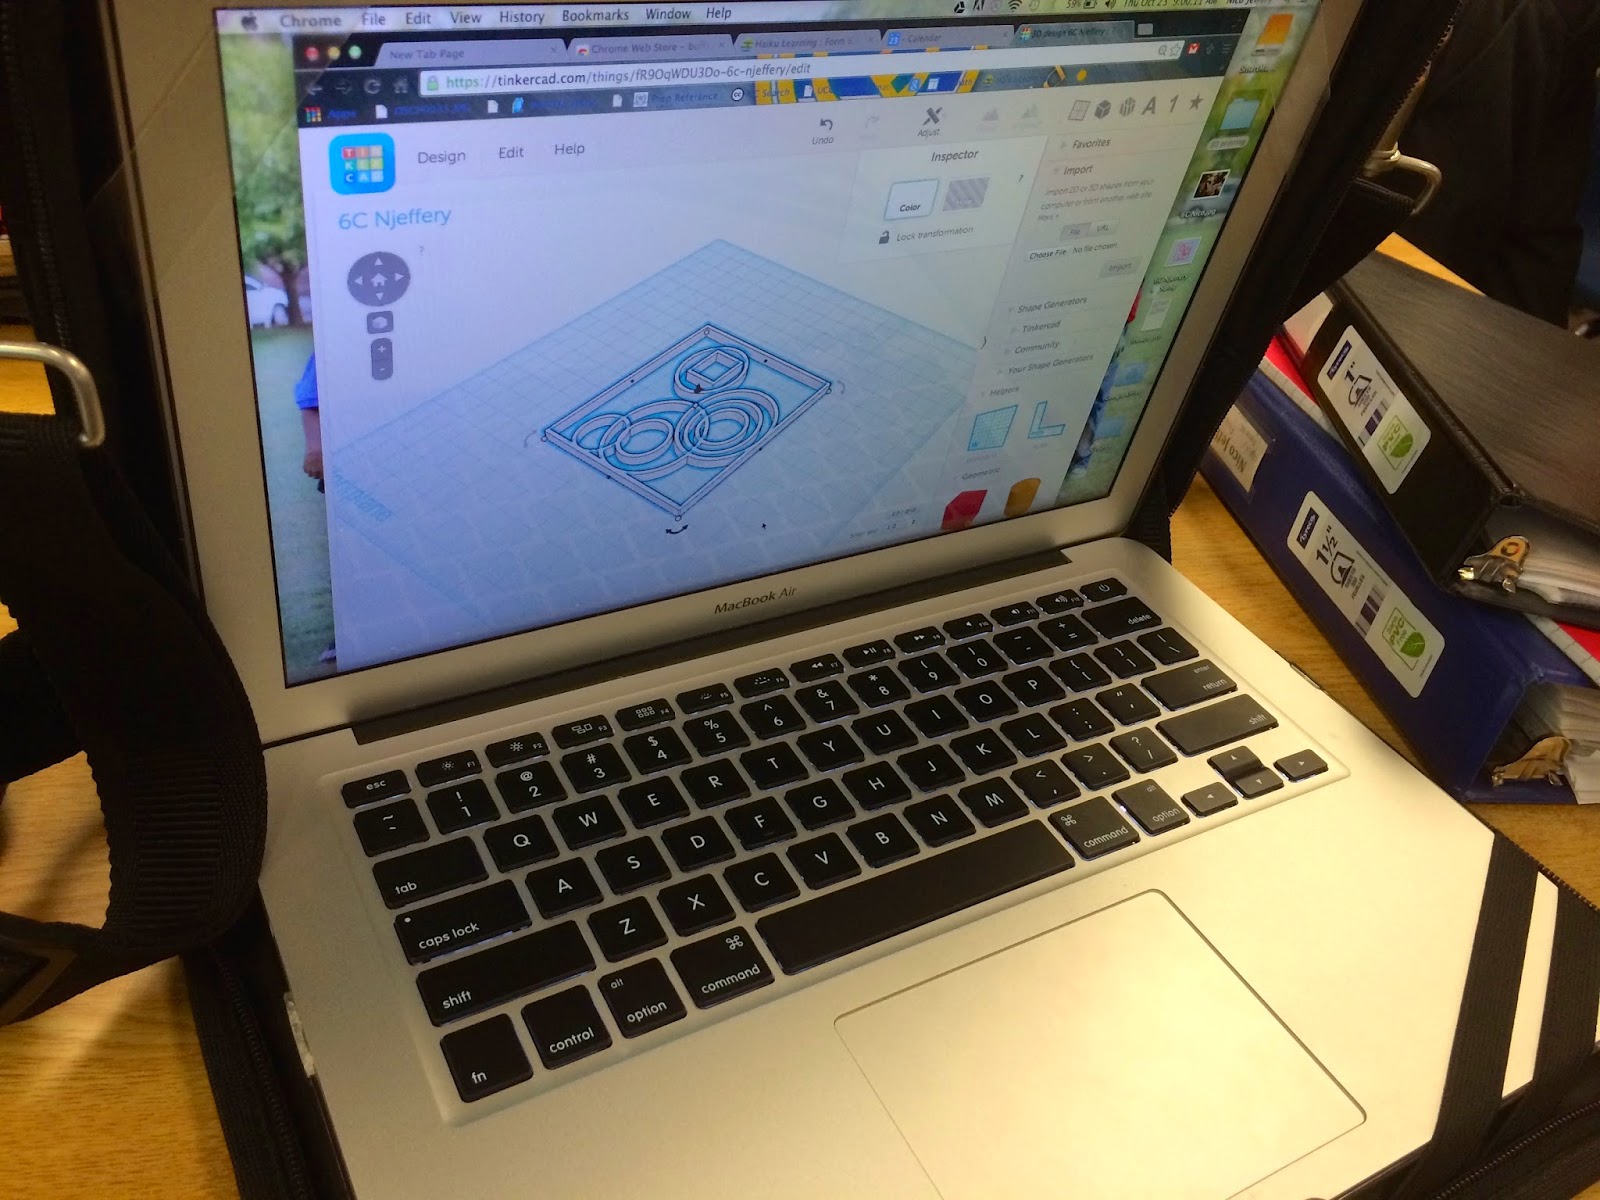
Each student chose one design and used Turtle Art programming software to recreate a similar design on their computer. Their "turtle" had to be instructed how to move to trace out their design. The boys used simple programming commands such as using an x-y coordinate system, "pen down", "move forward 25 steps", "turn 45 degrees" as well as more advanced programming structures including loops to recreate their design. Adjustments and modifications were made at this time in order to make the design manageable in the digital environment.


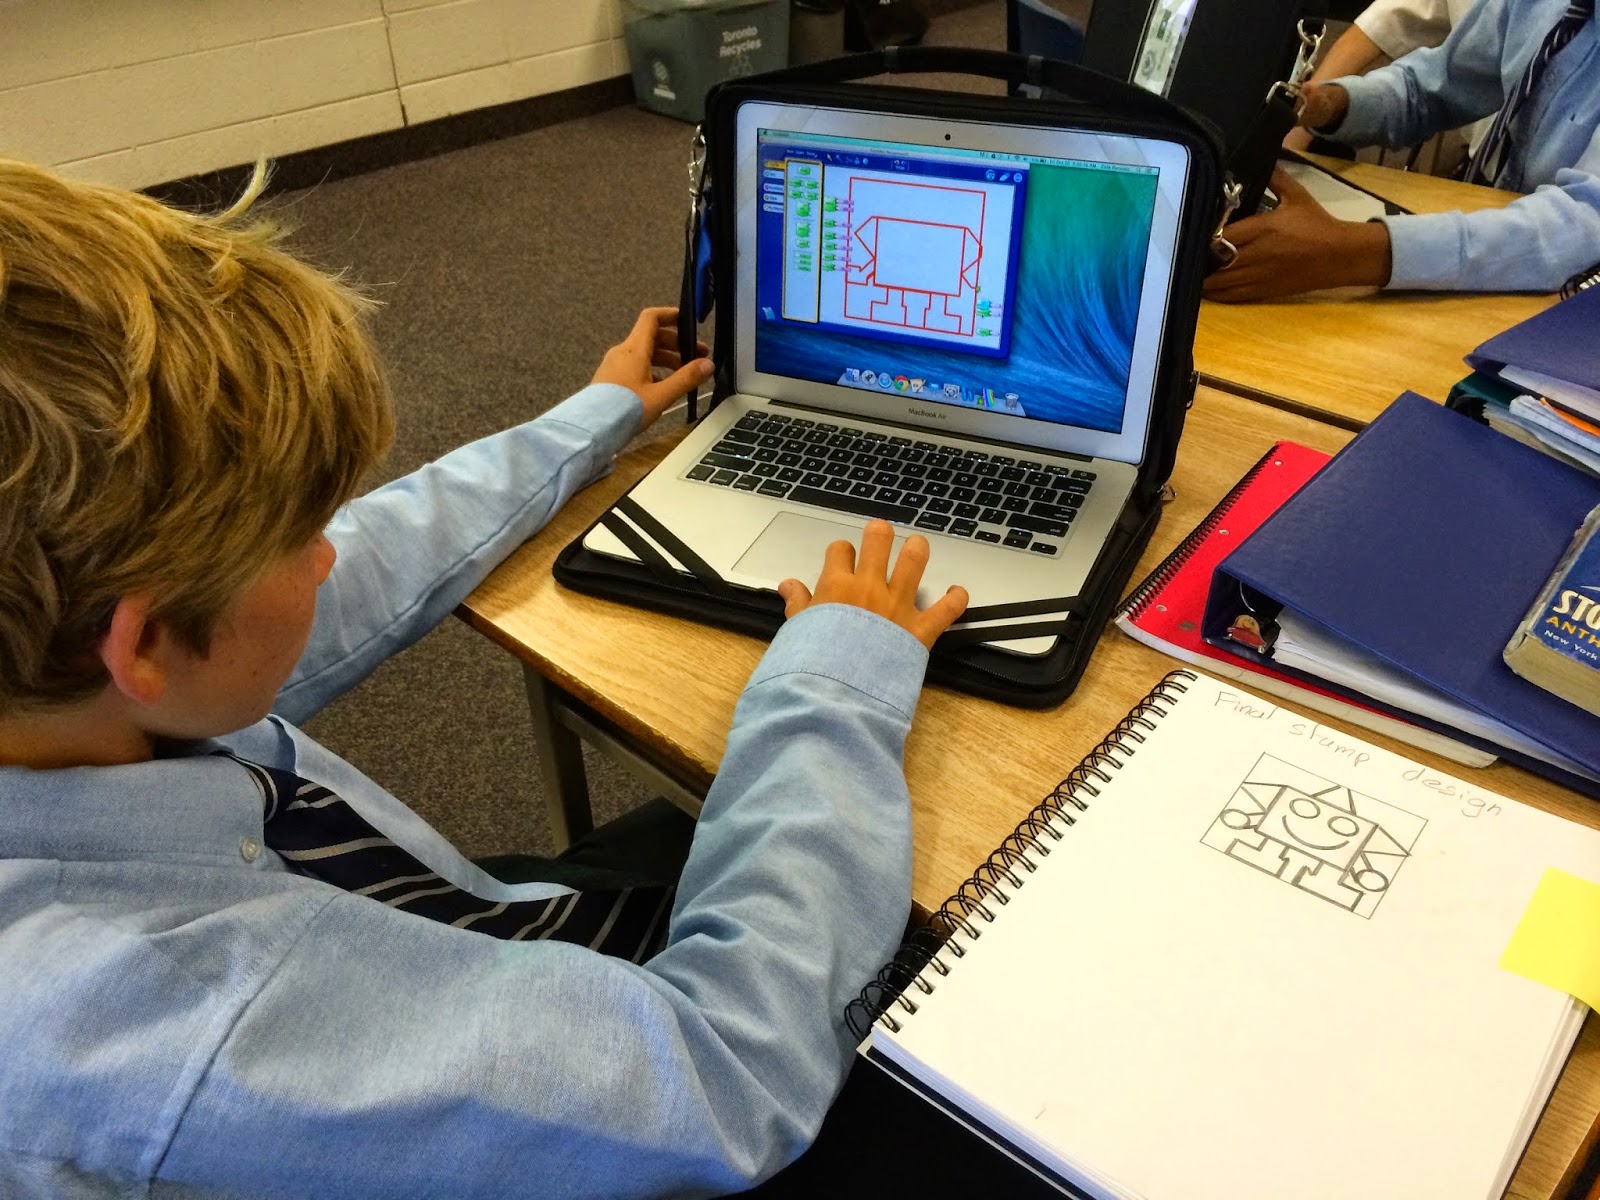
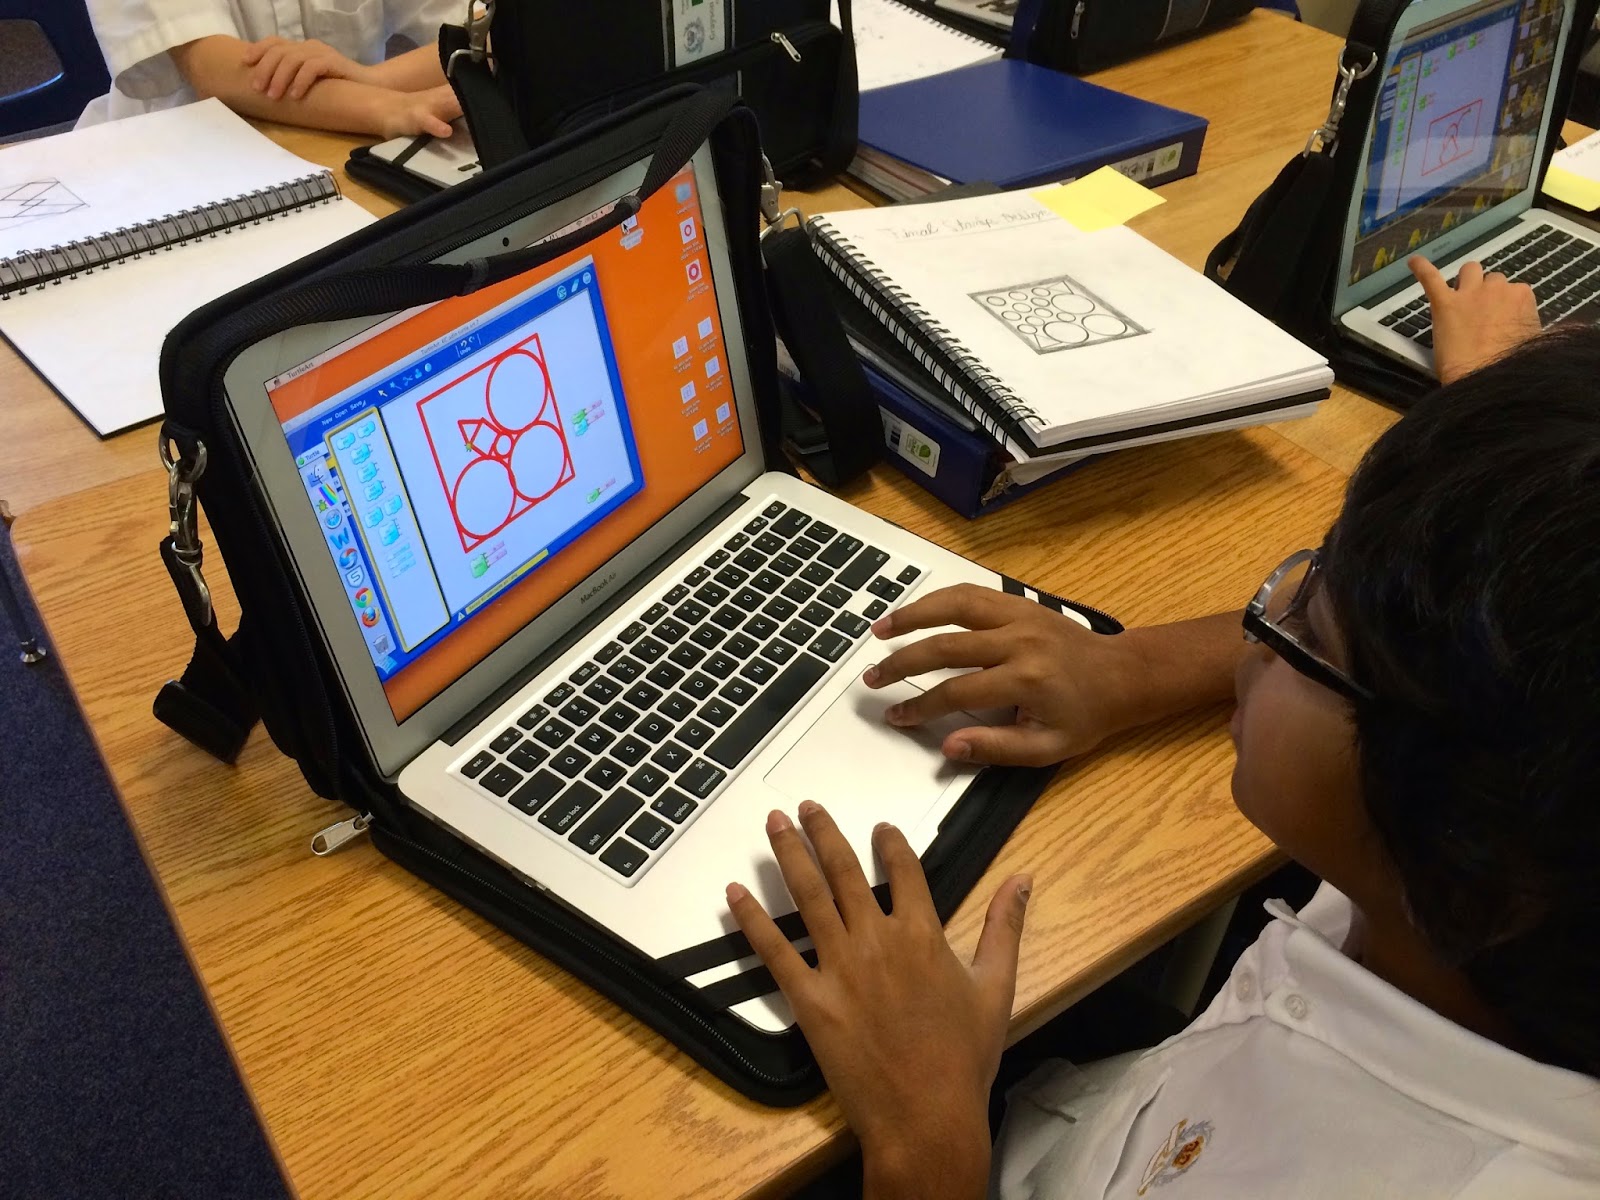
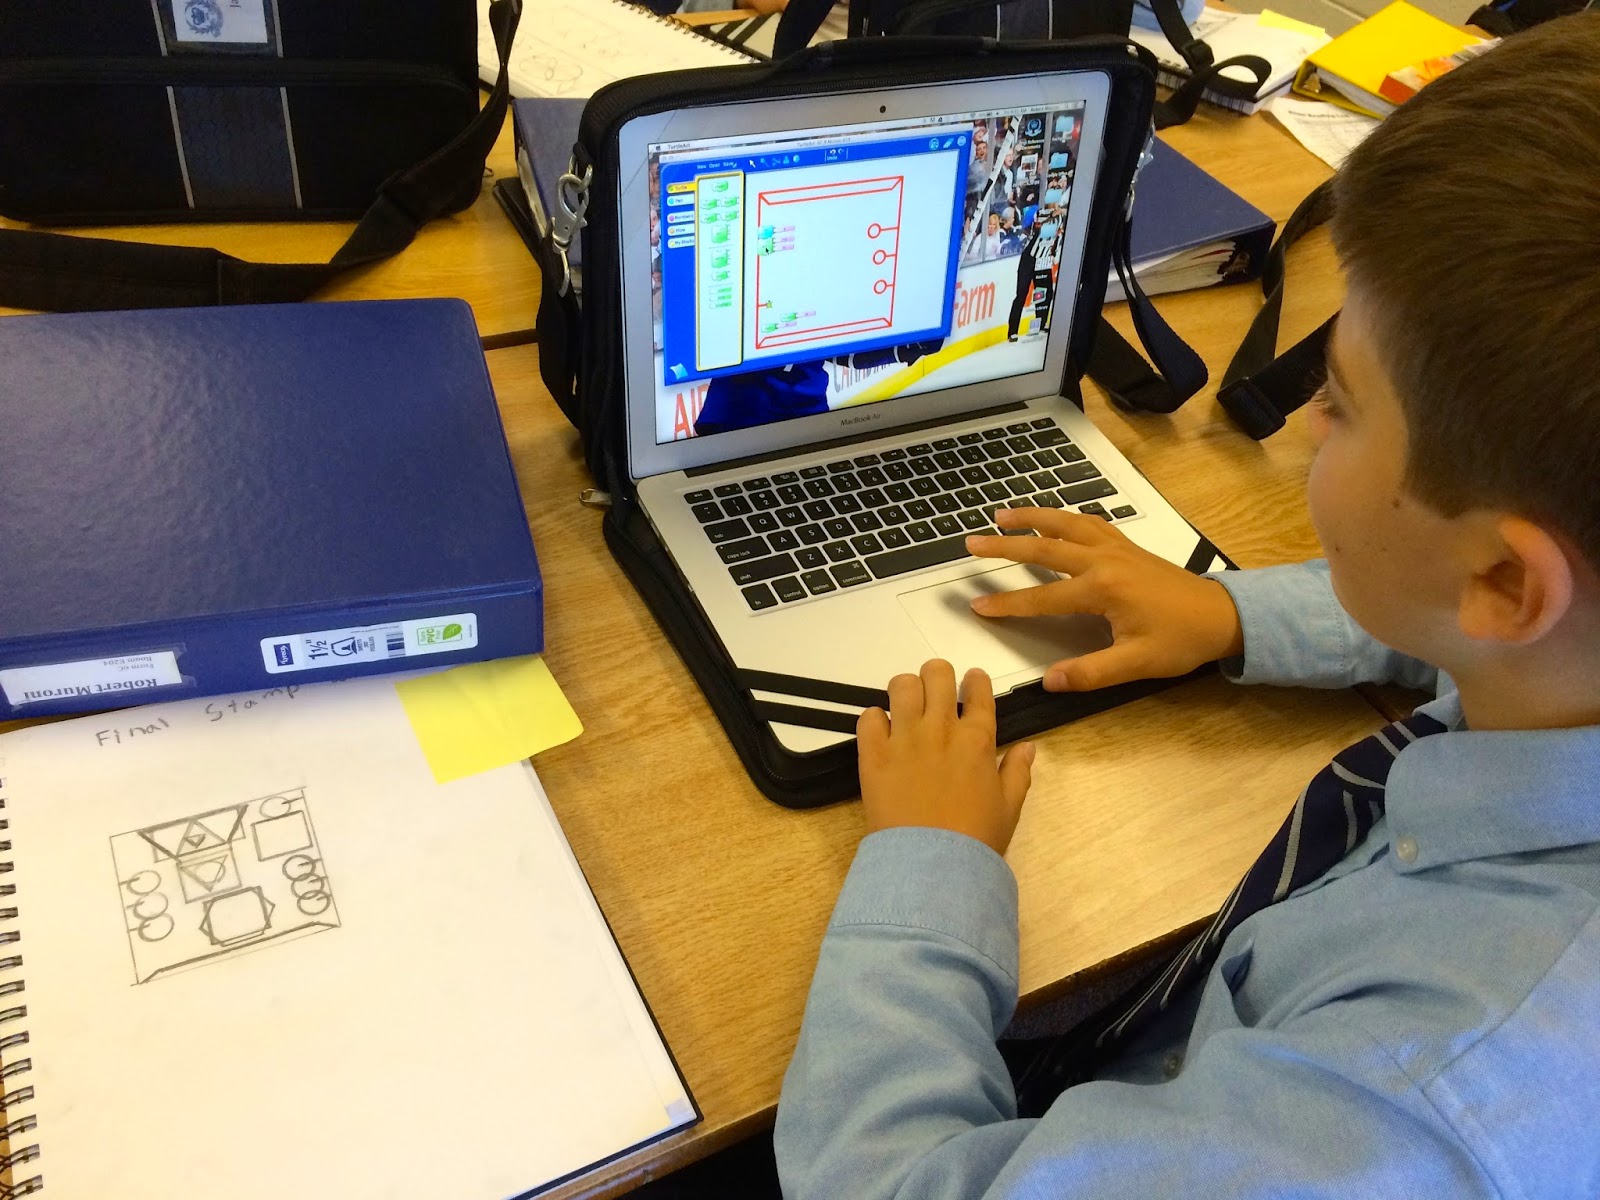
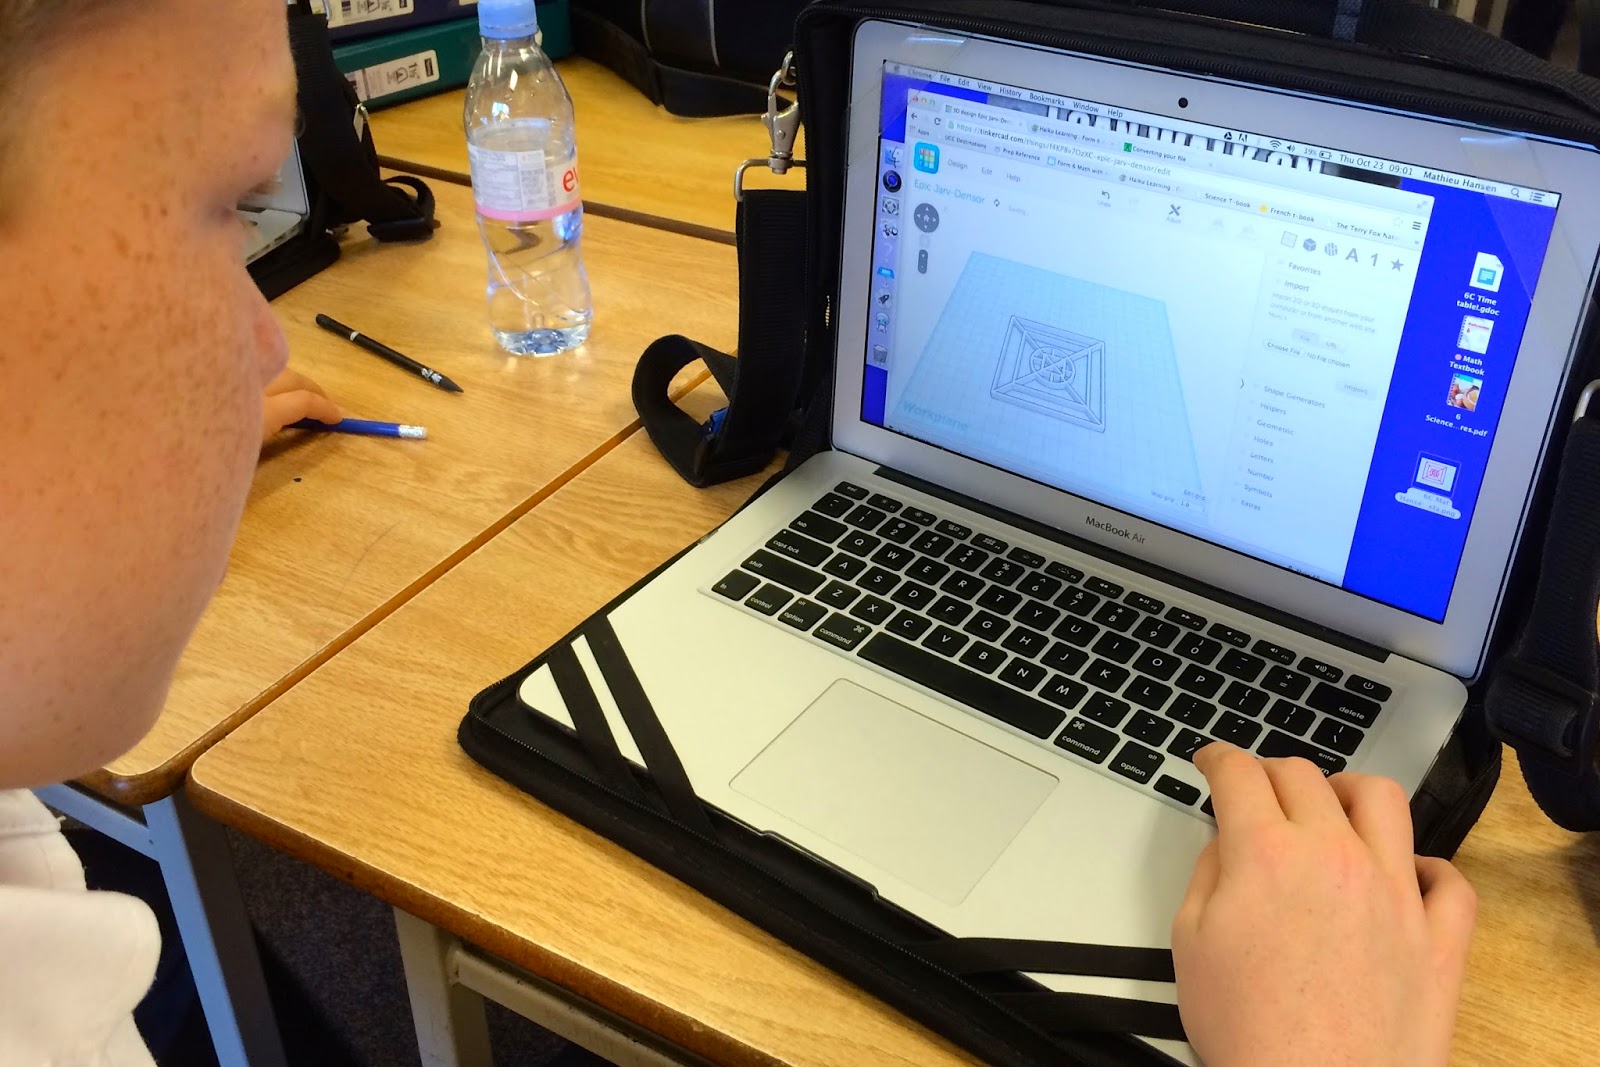
Once the boys were pleased with their Turtle Art image, they exported the file and imported it into the 3D design software, Tinkercad. With Tinkercad, the students were able to add height to their originally flat drawing. They adjusted the length, width and height of their stamp to meet the set specifications. 


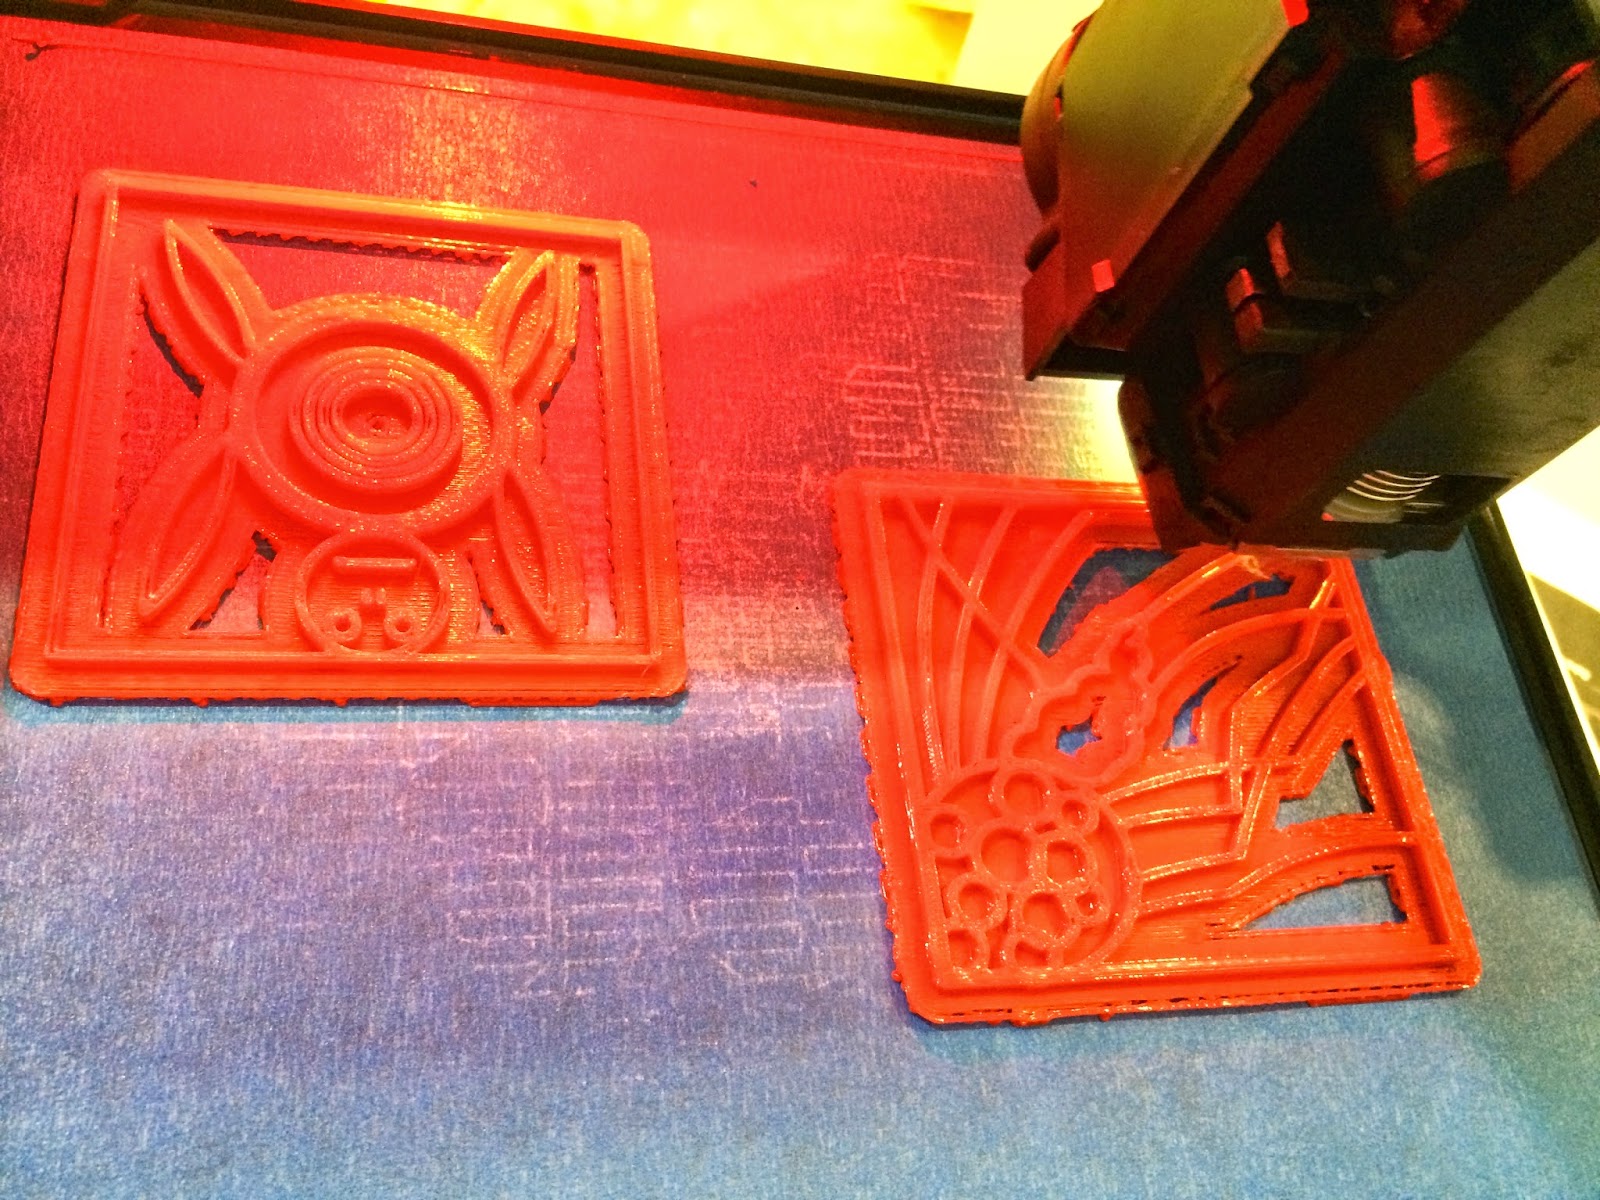
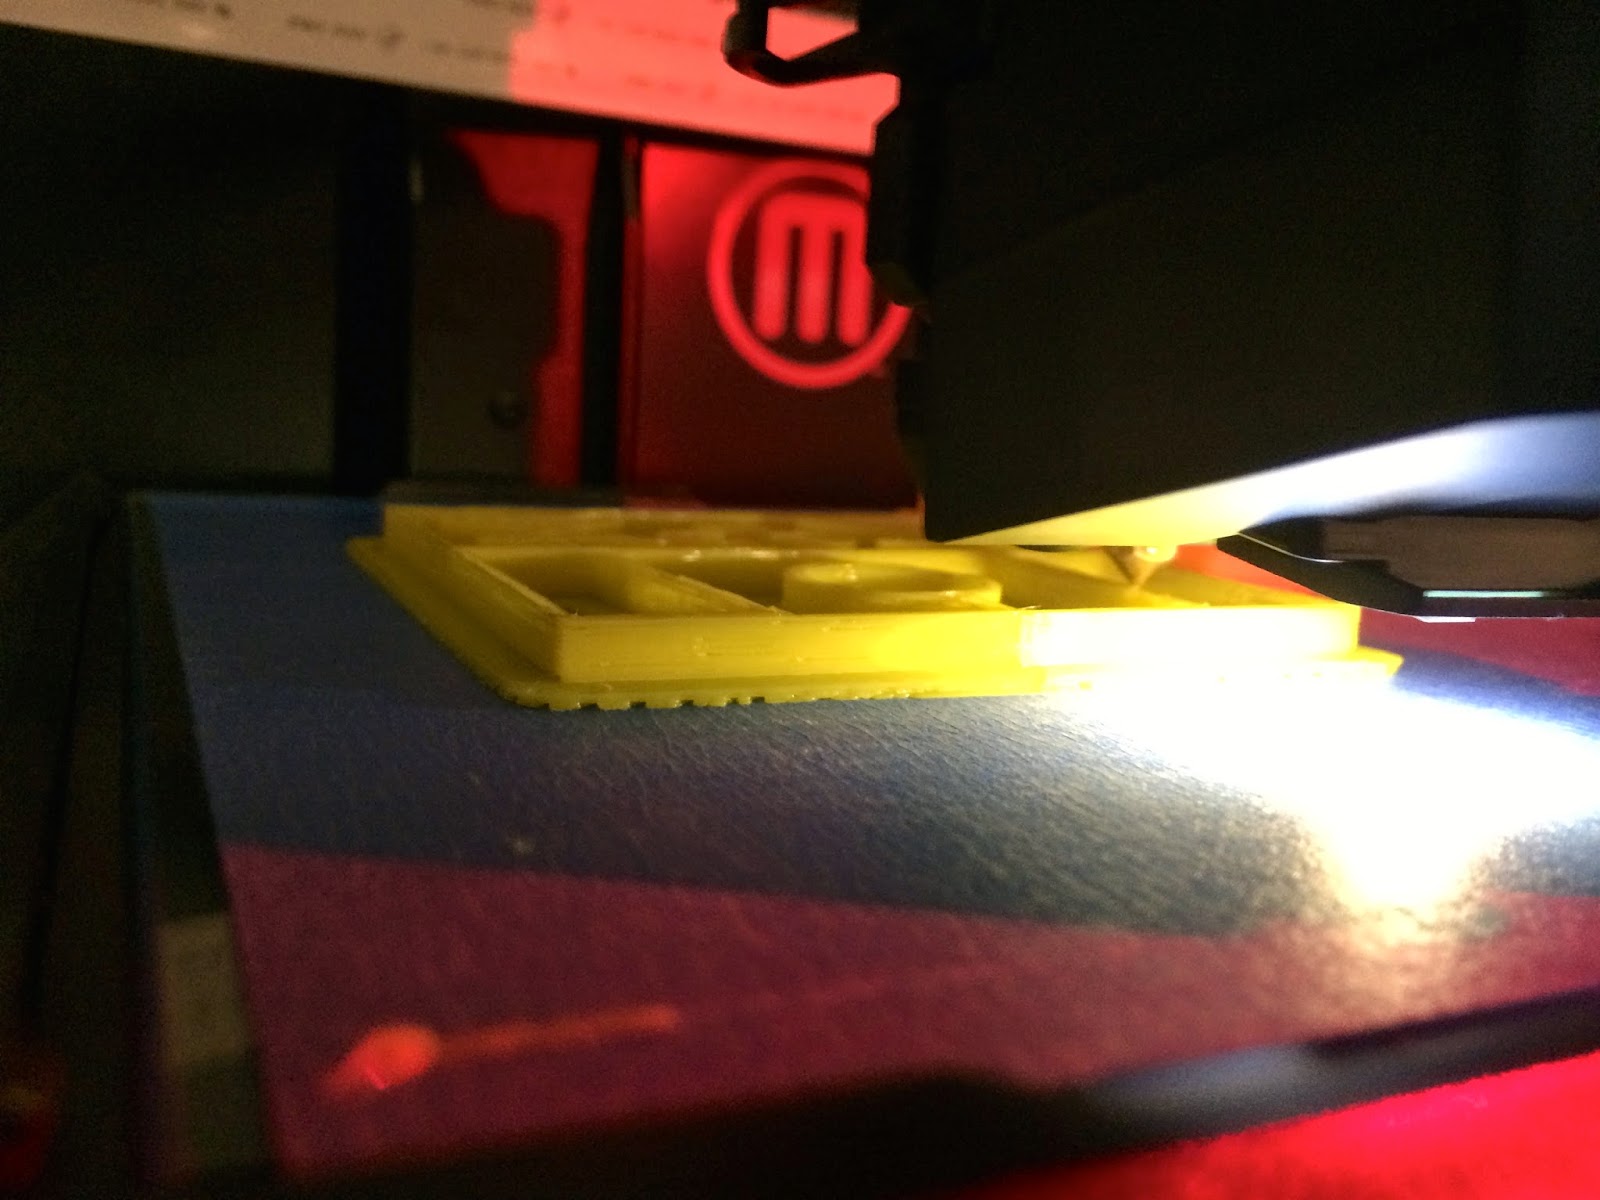
After exporting their 3-dimensional design, we loaded it onto one of the school's 3 MakerBot printers. Over several weeks, all 88 stamps were printed and ready for use in art class. Each class's stamps were printed in a different colour, trying to keep the sets organized.


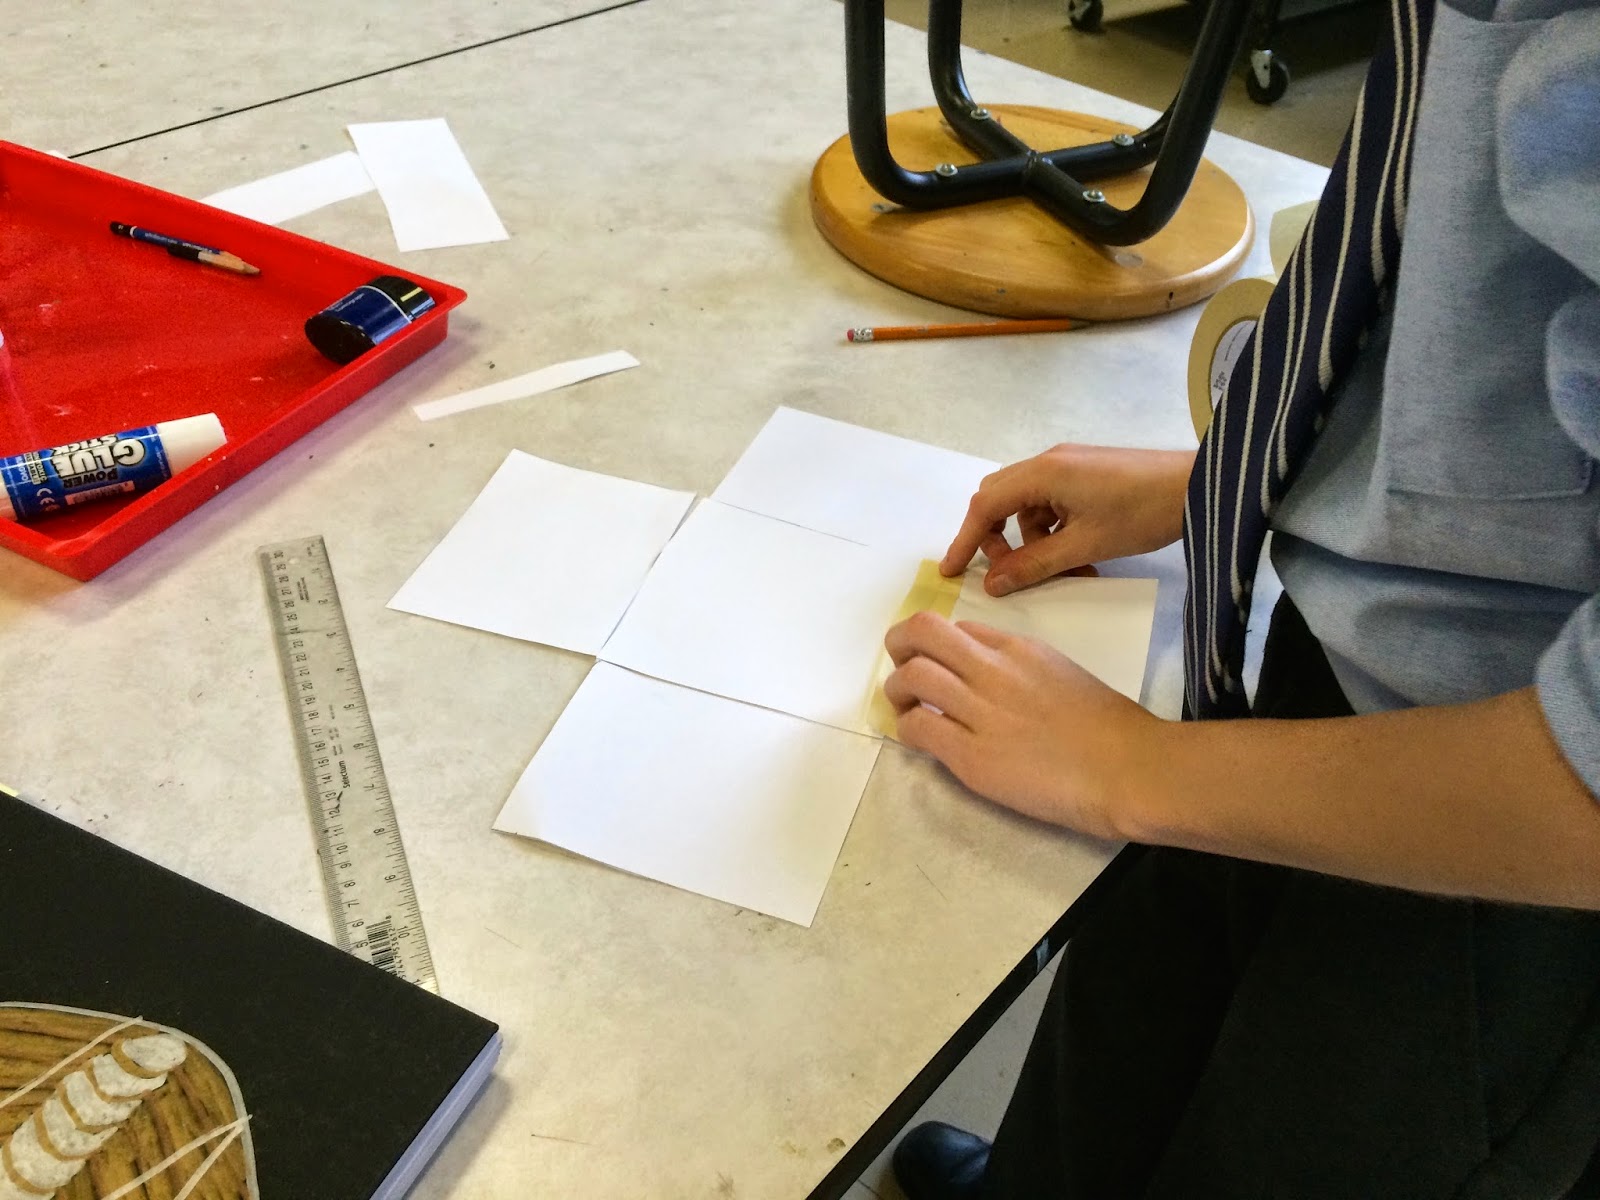
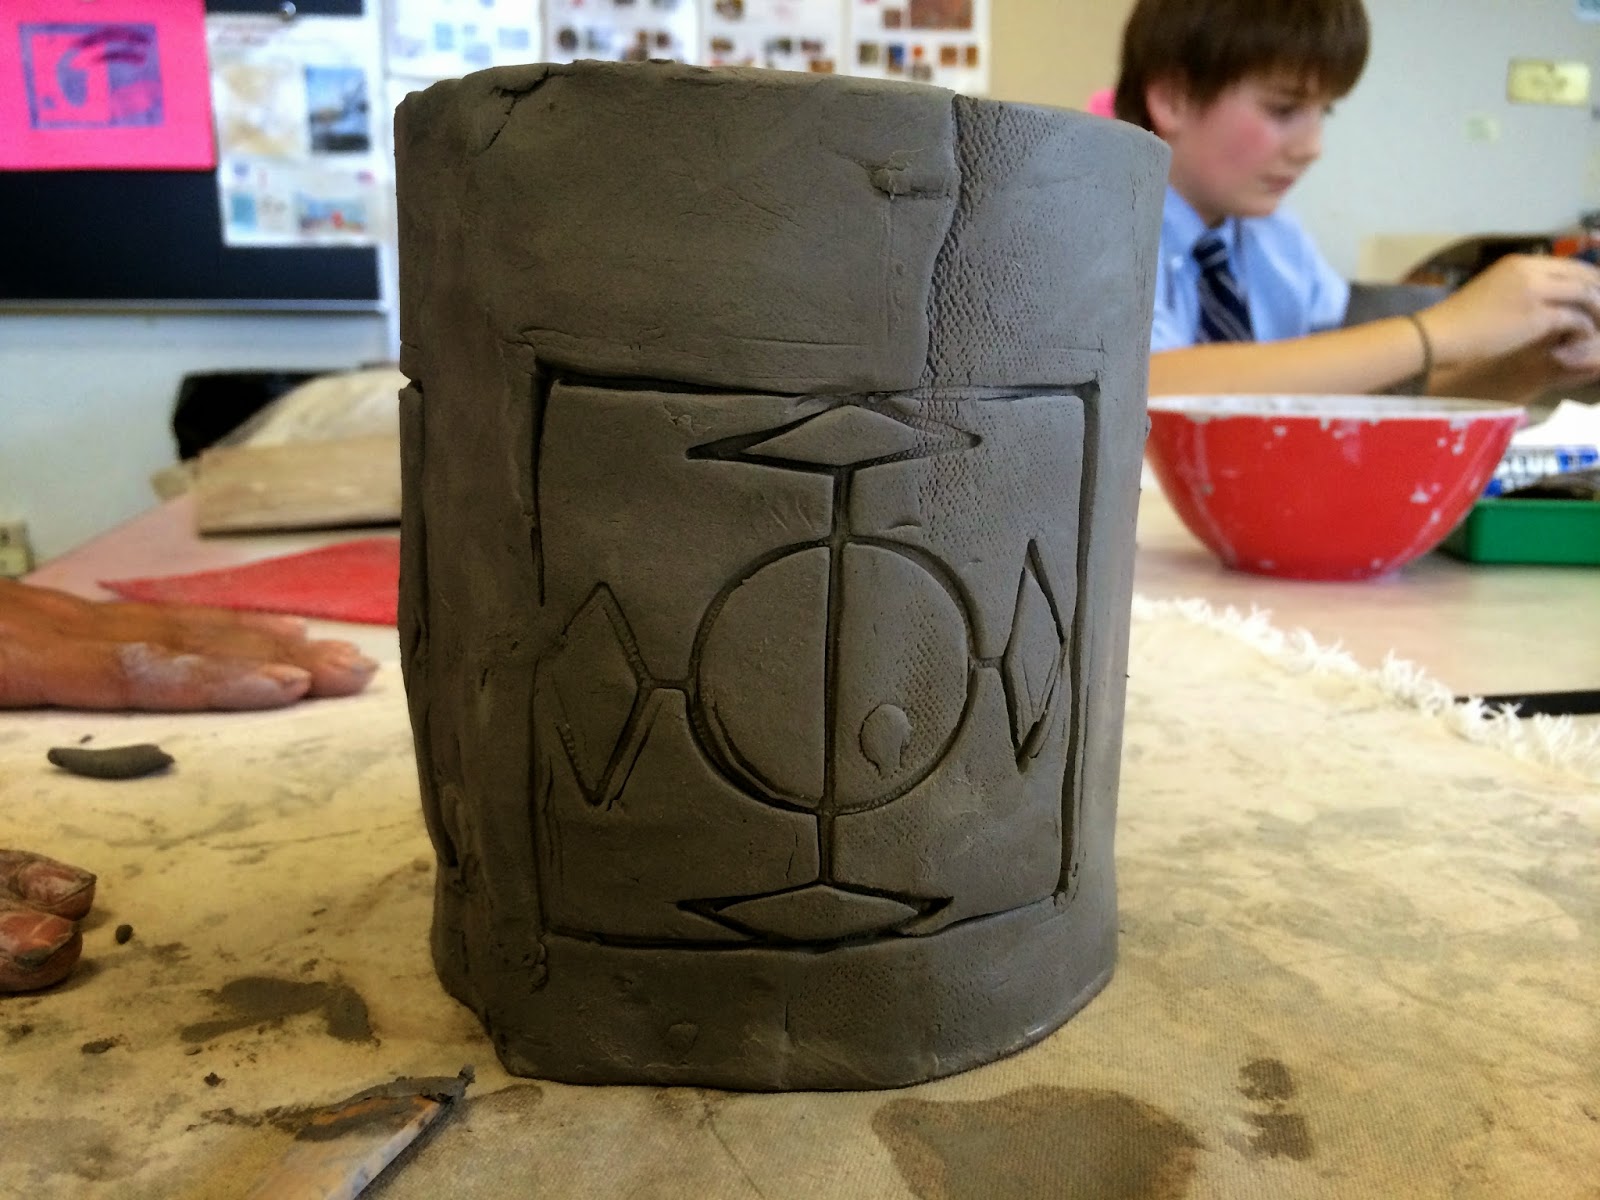
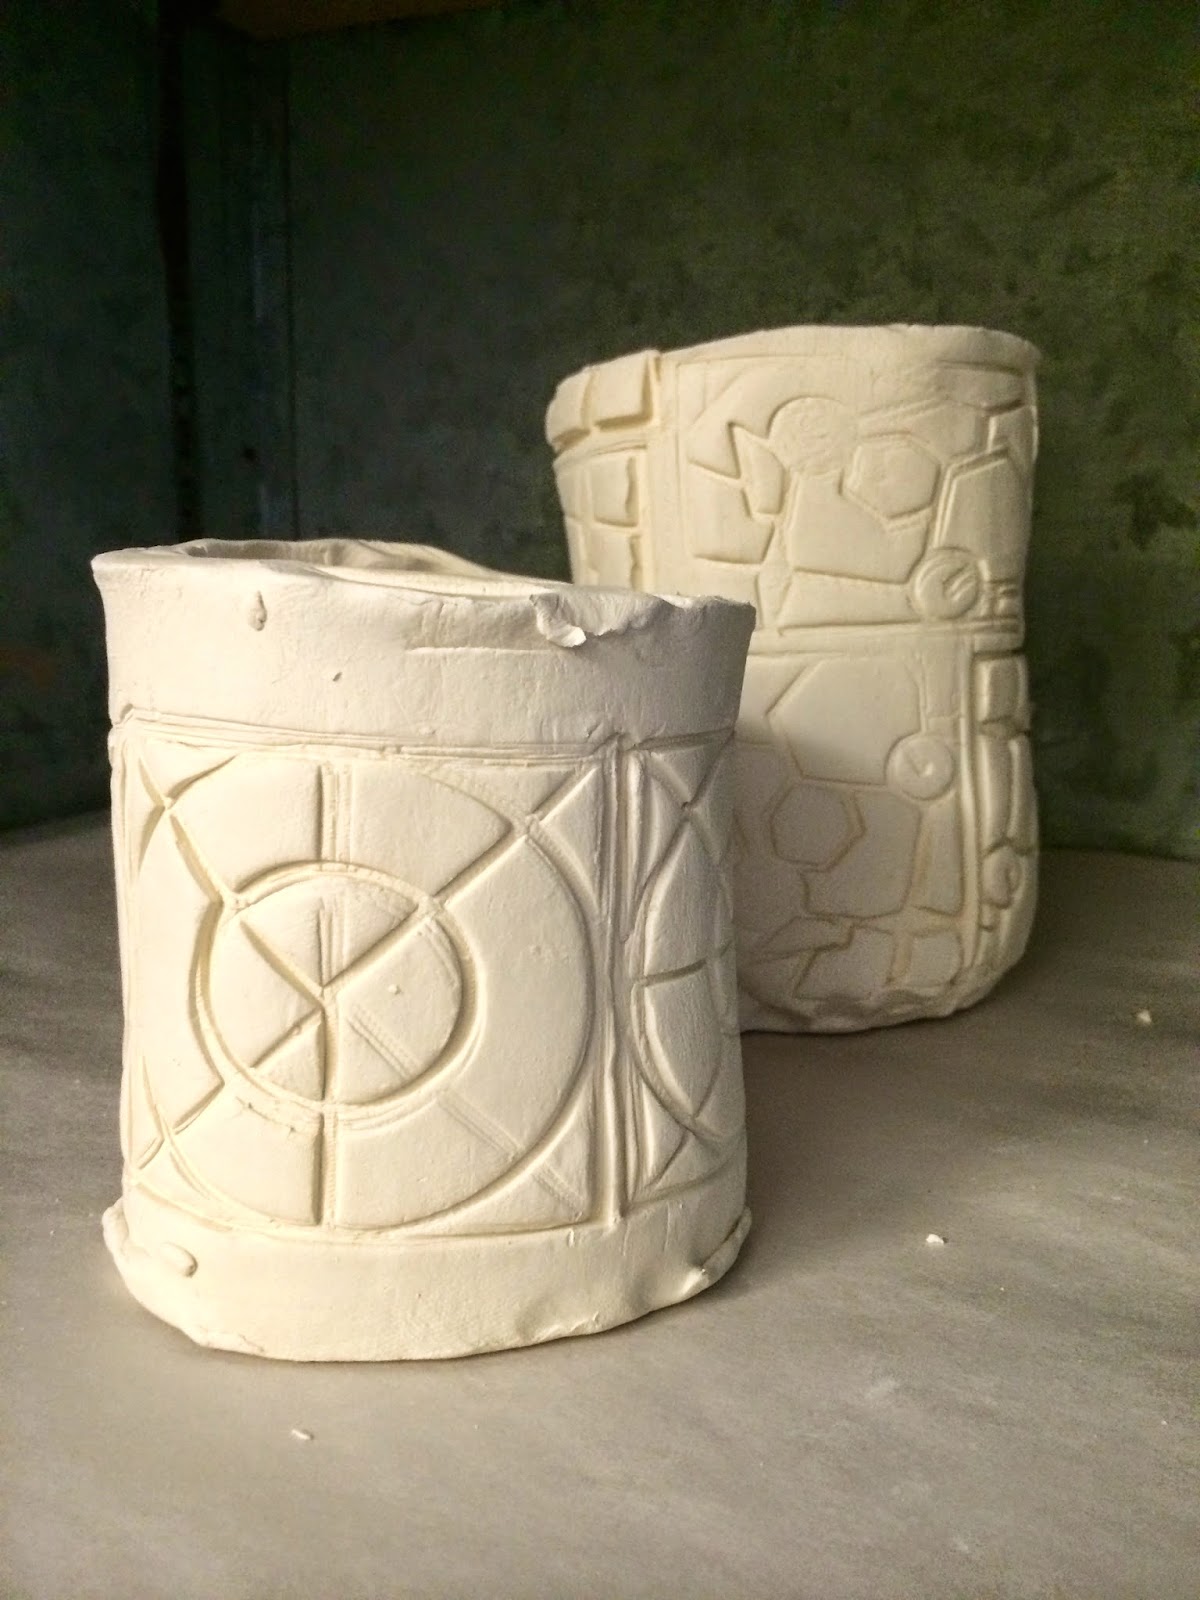
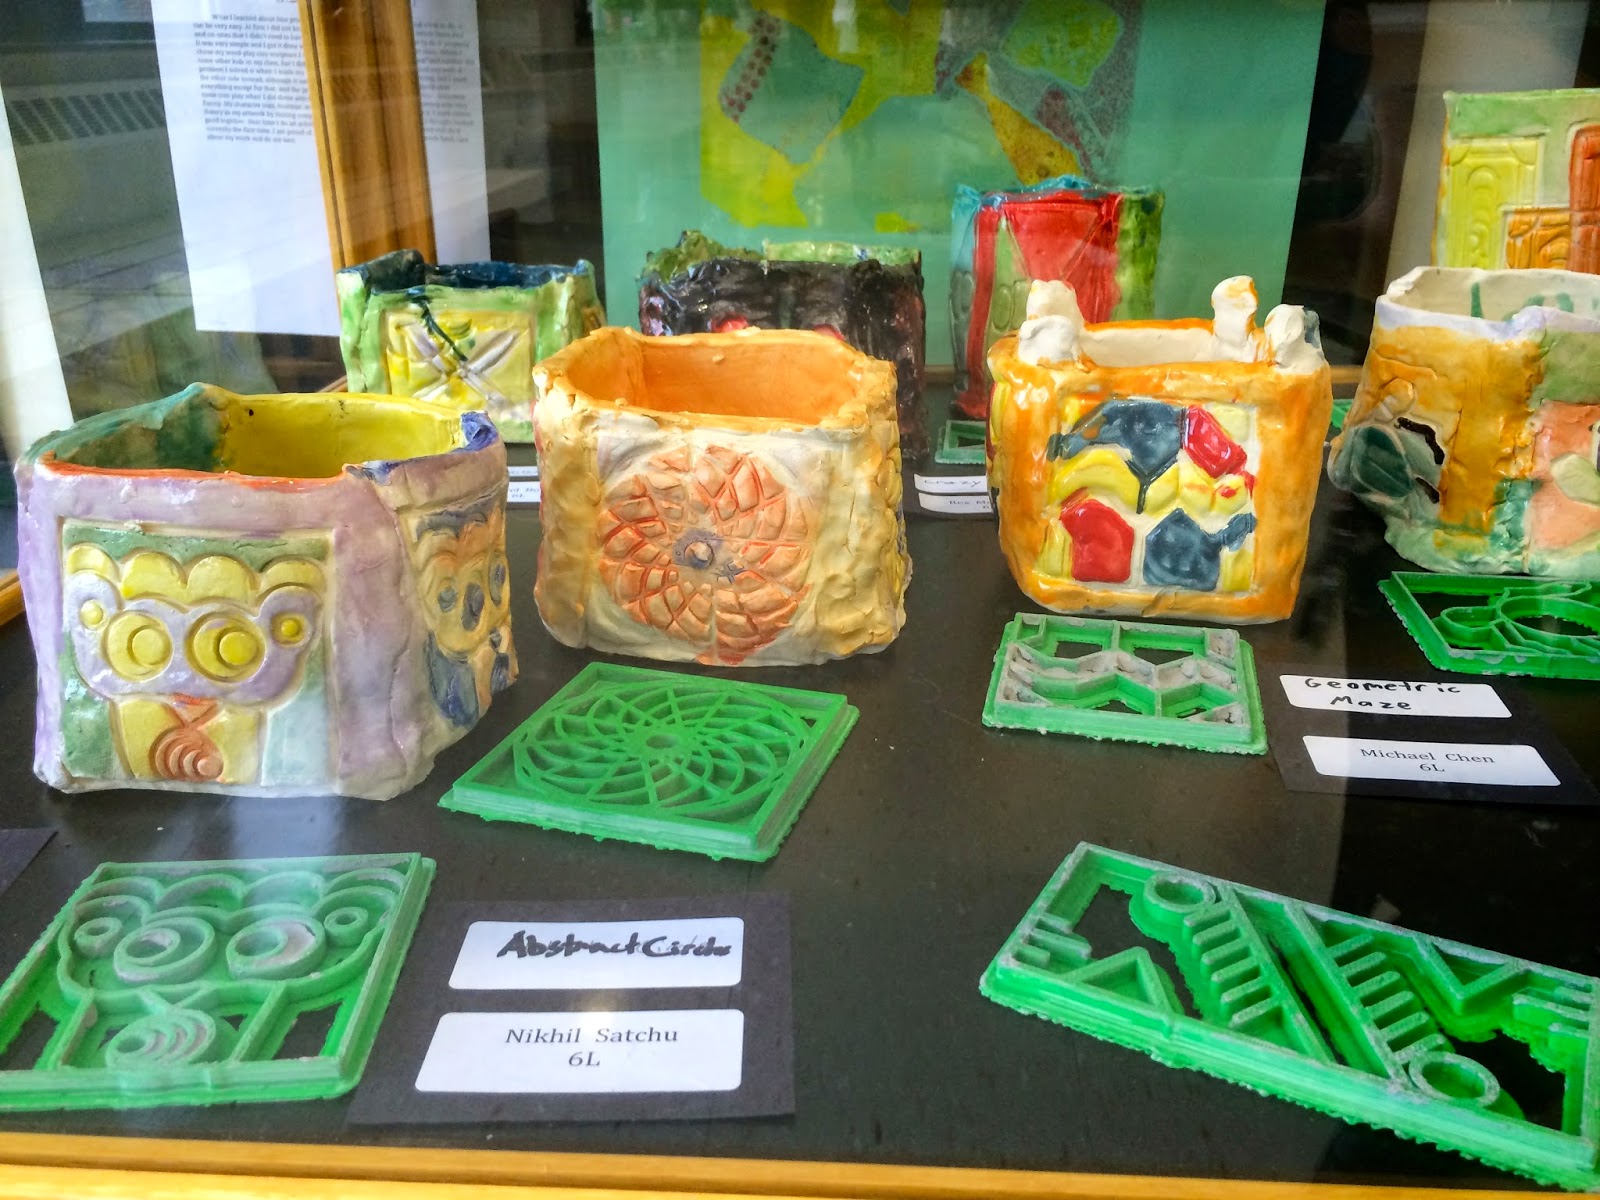
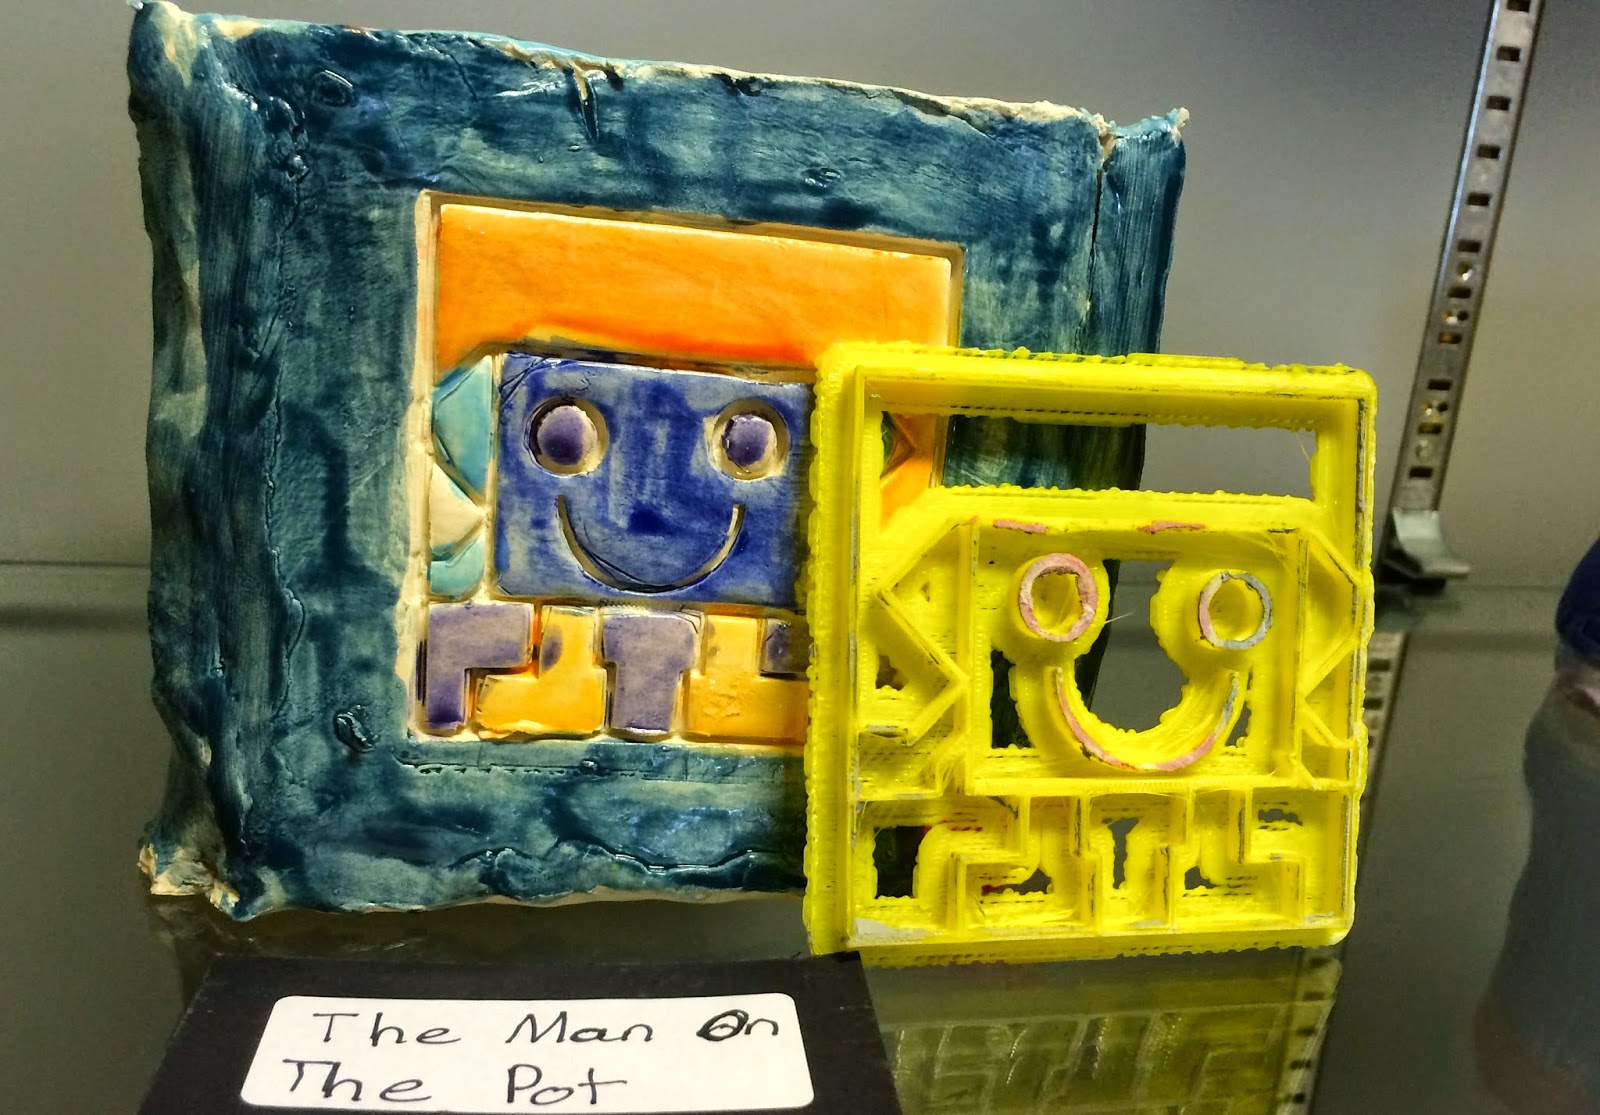
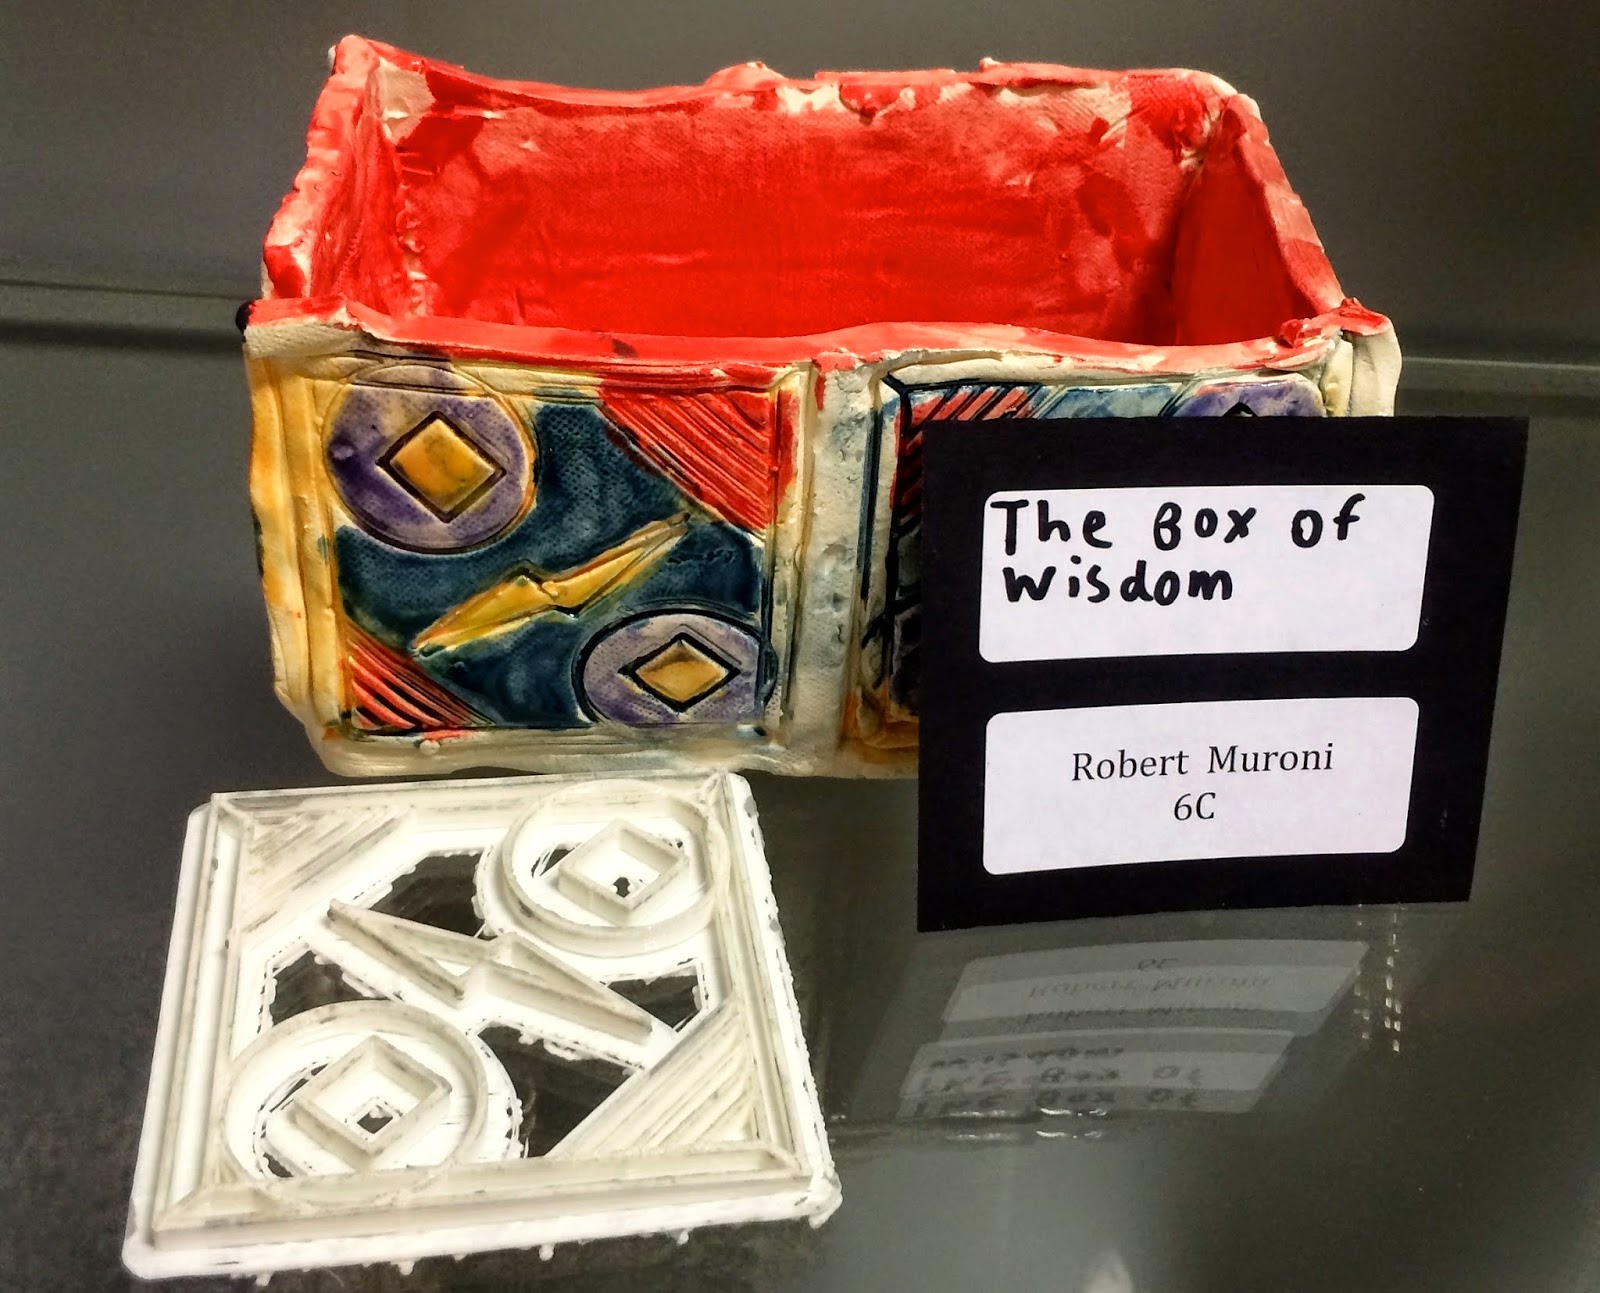
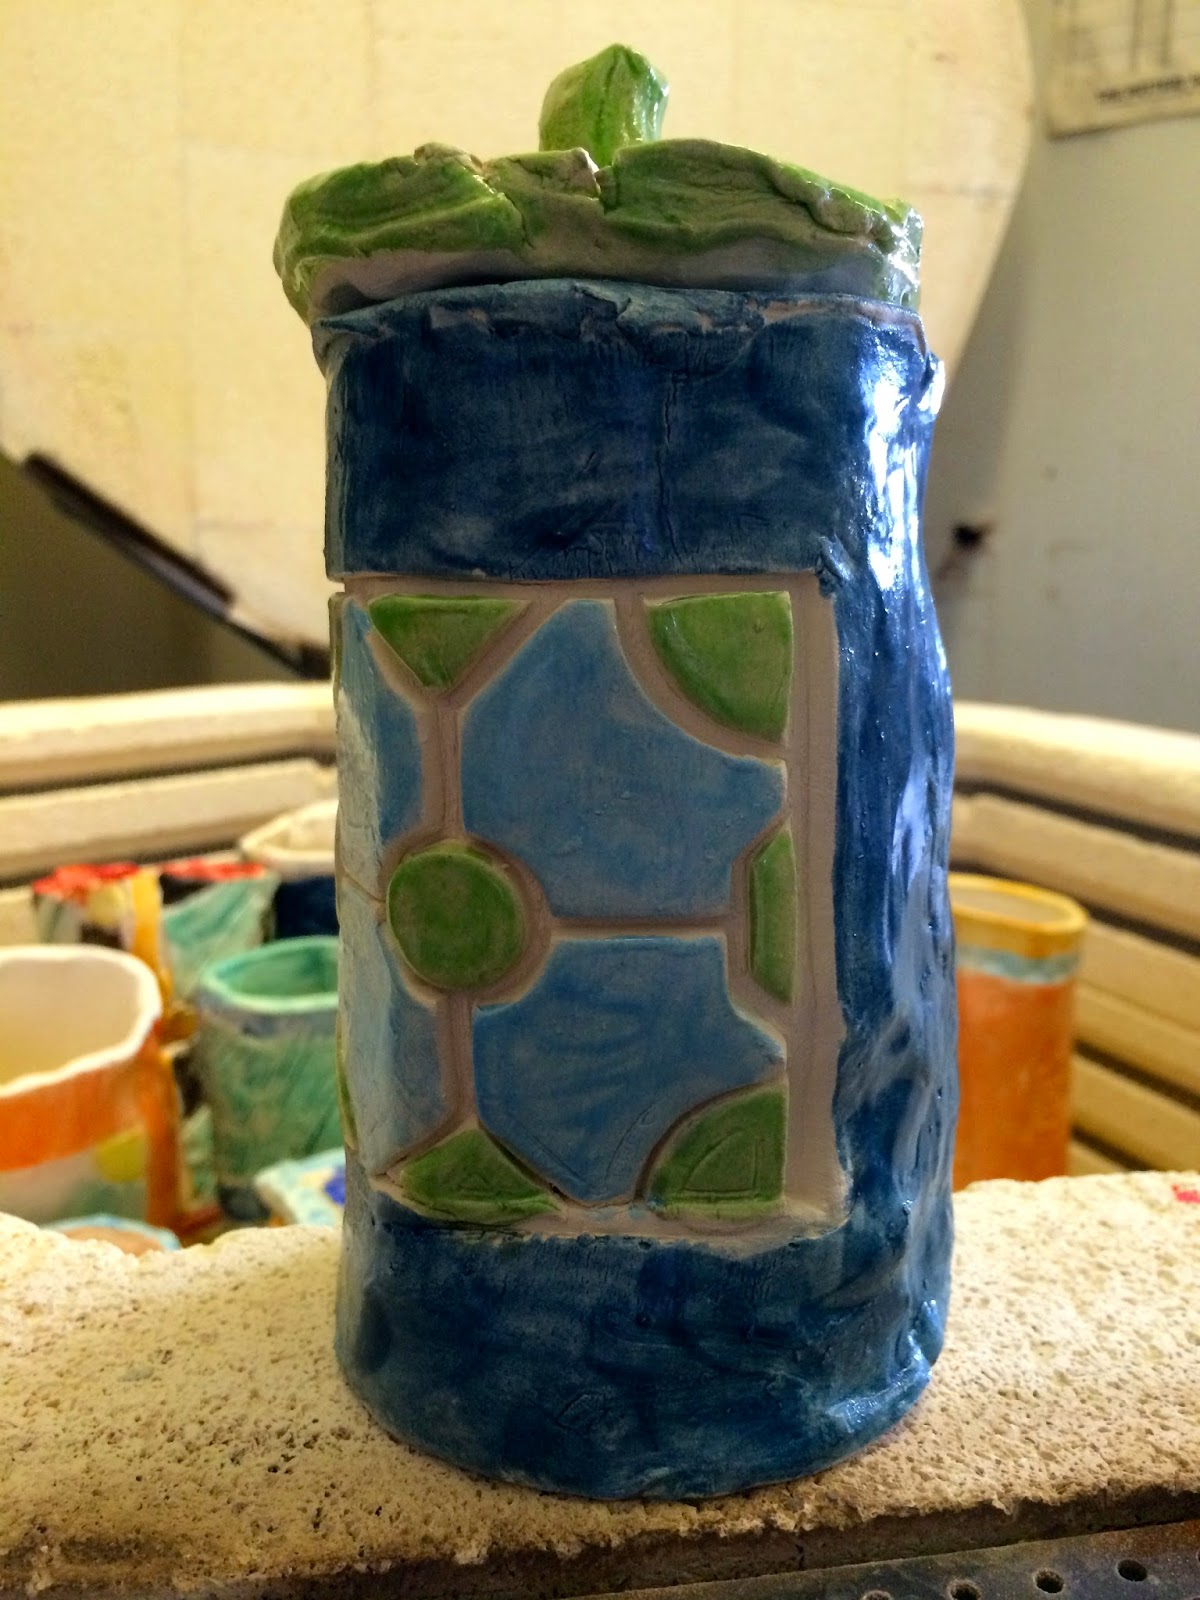
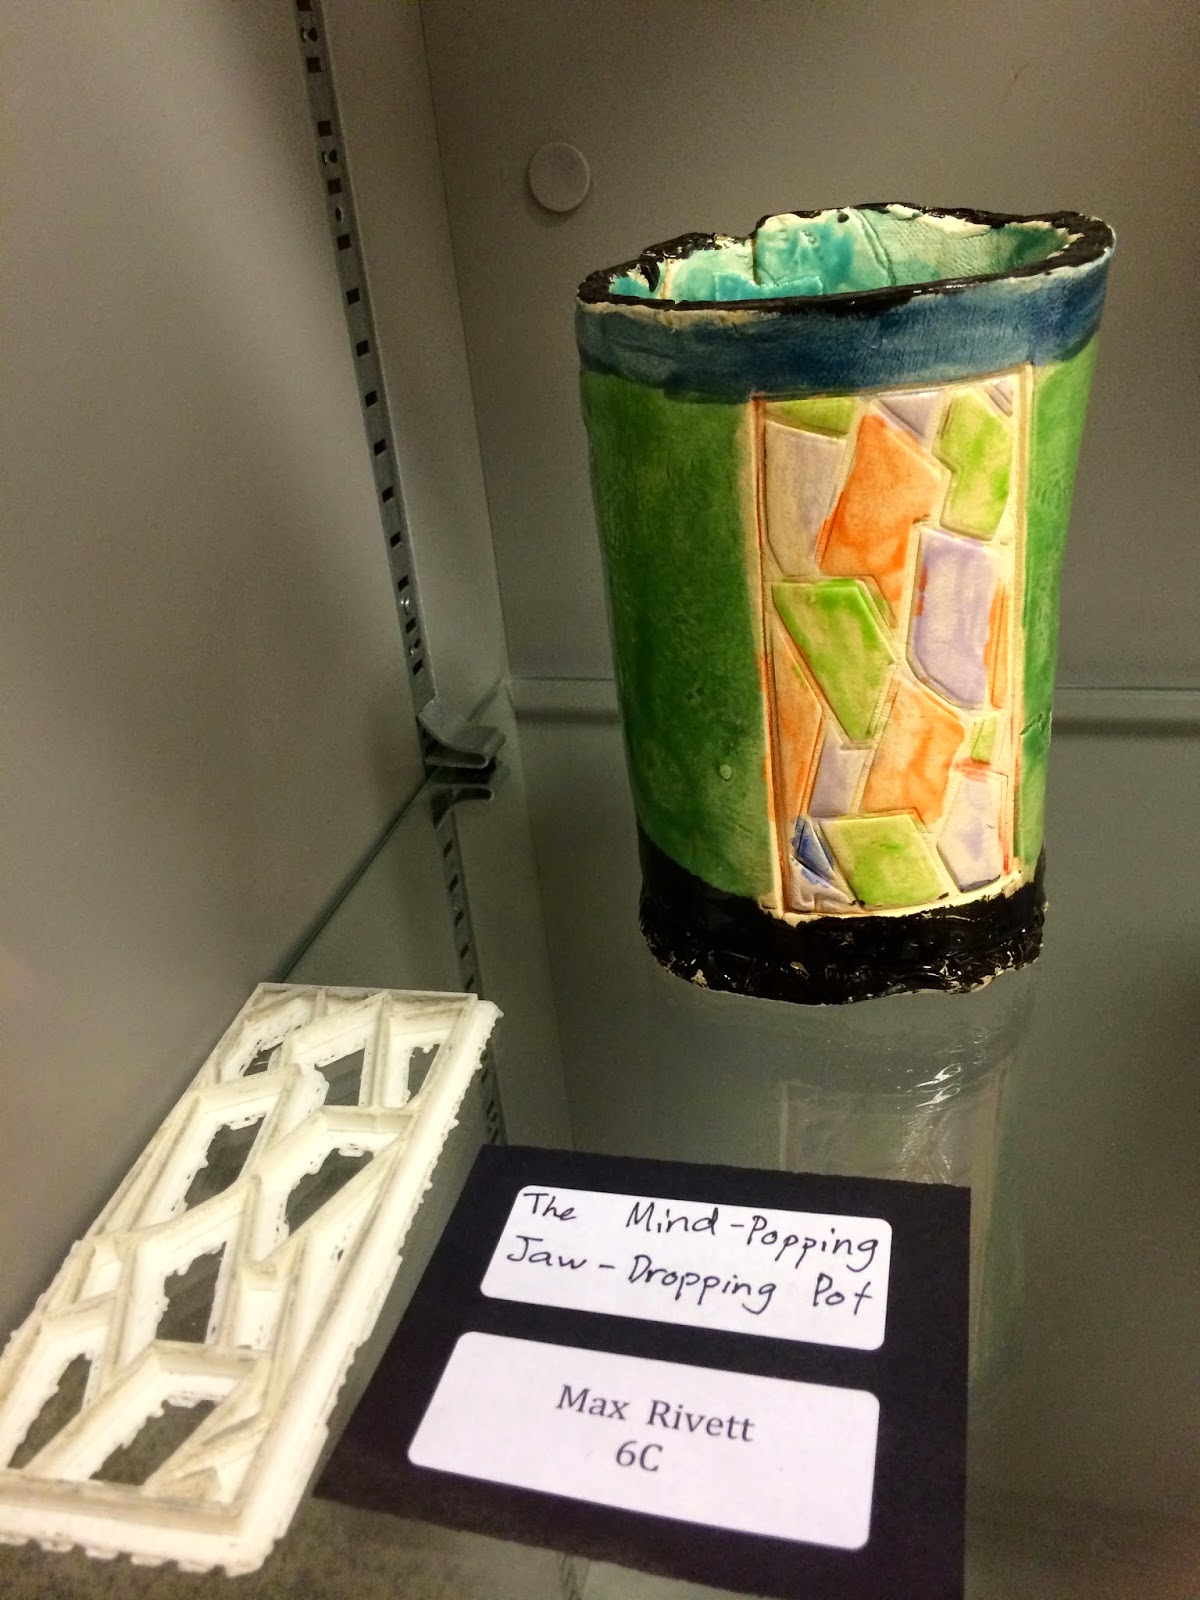
Before the boys could stamp their clay, they had to learn about how to roll, cut and arrange the parts of their containers. They learned to use 2-dimensional nets that would "fold" into their desired 3-dimensional box or cylinder. Some boys chose to add tops to their containers as well. 


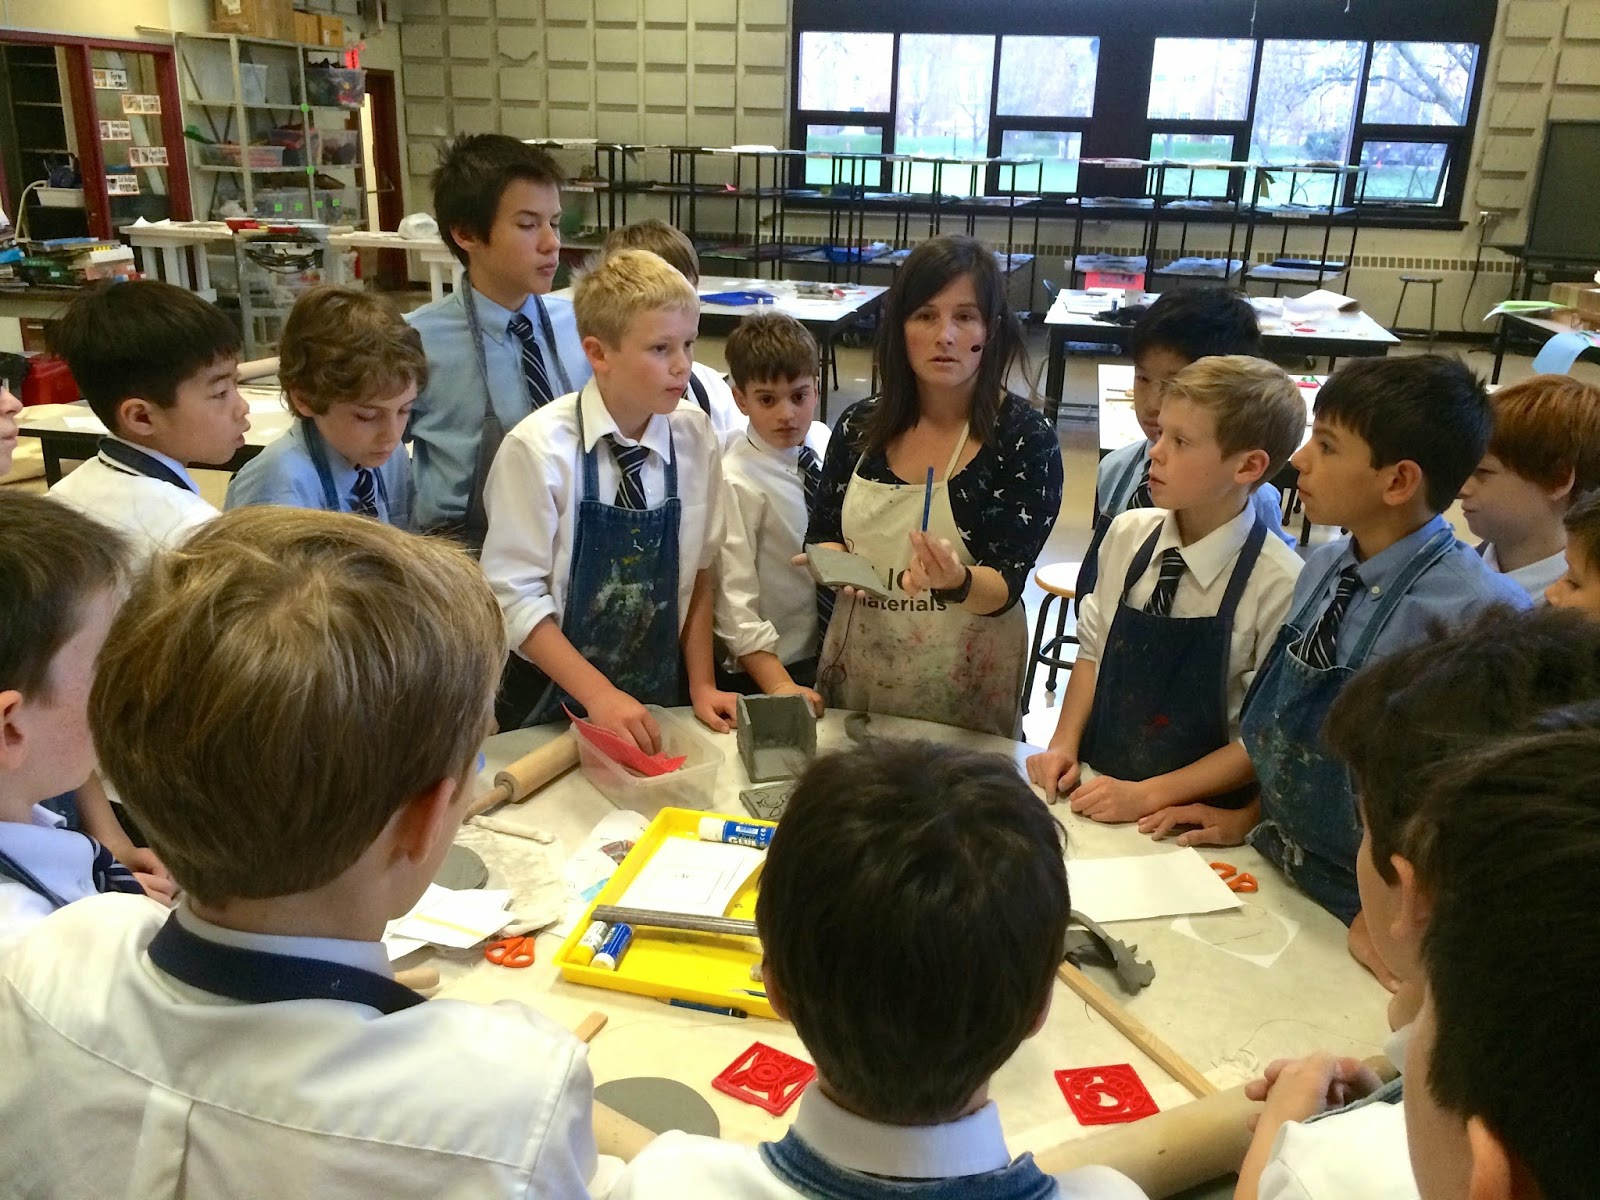
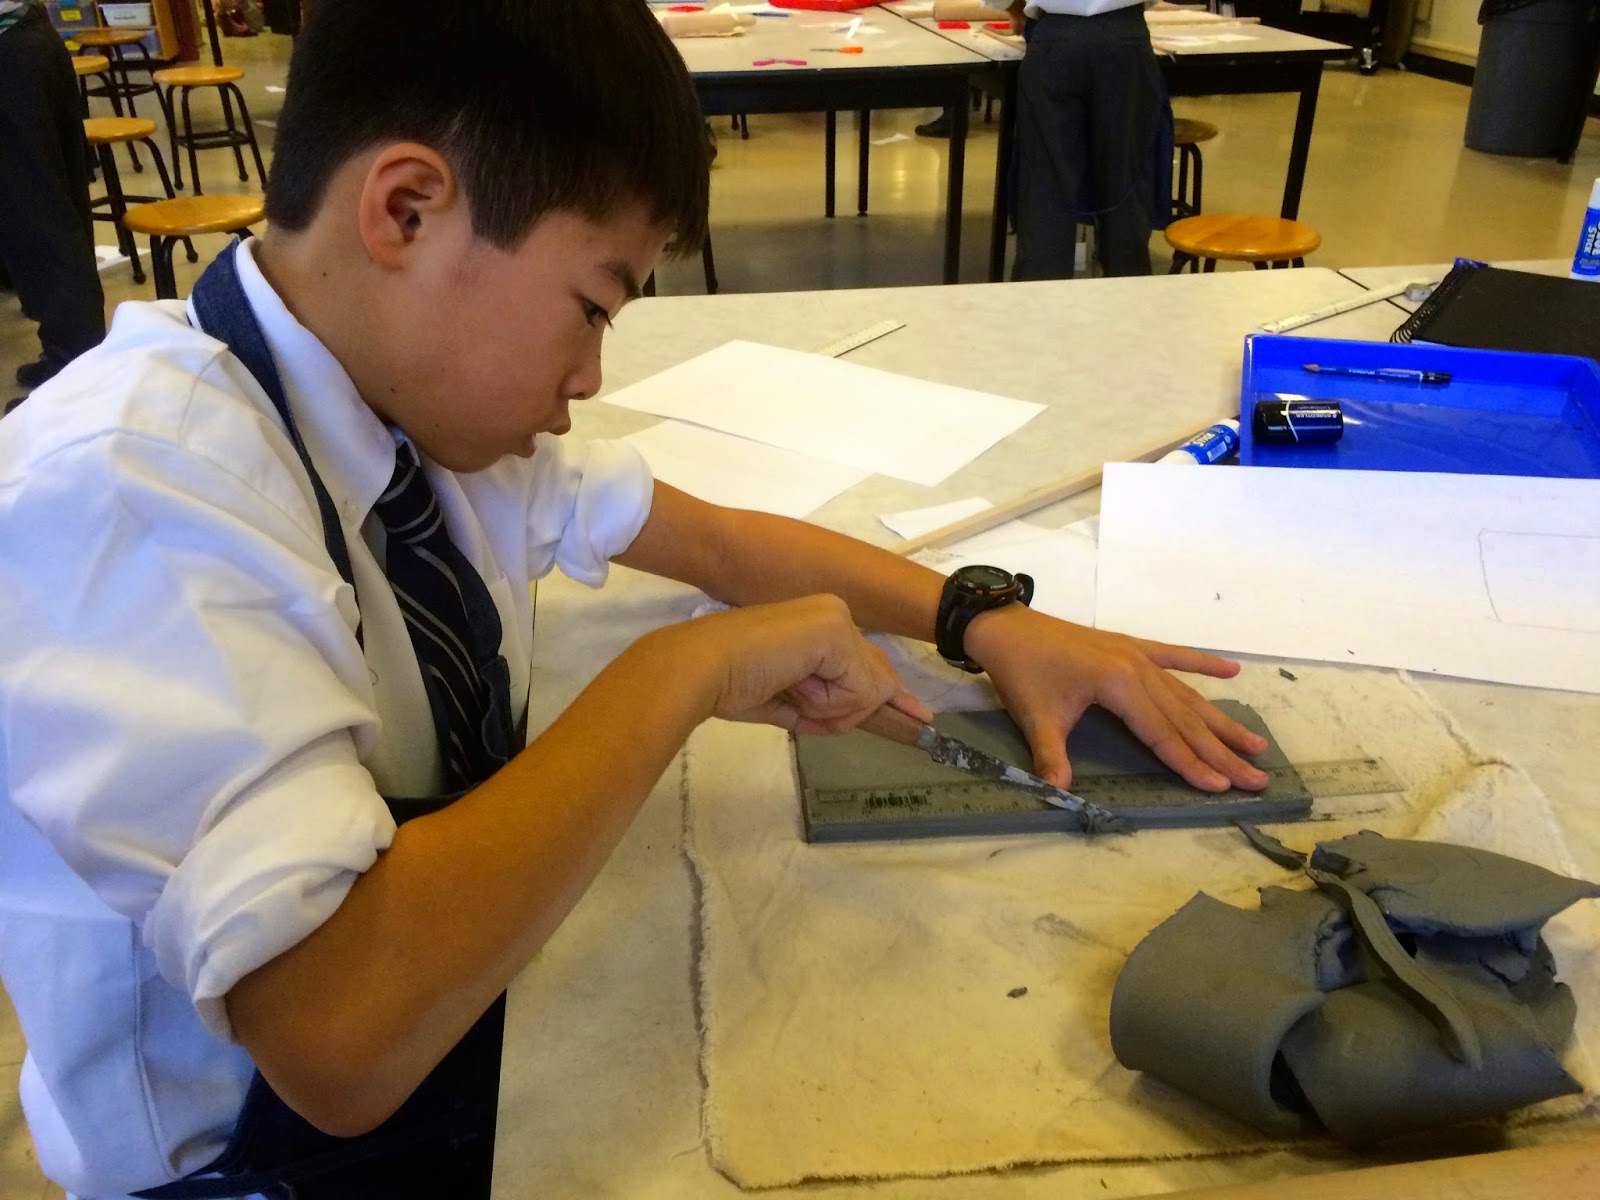
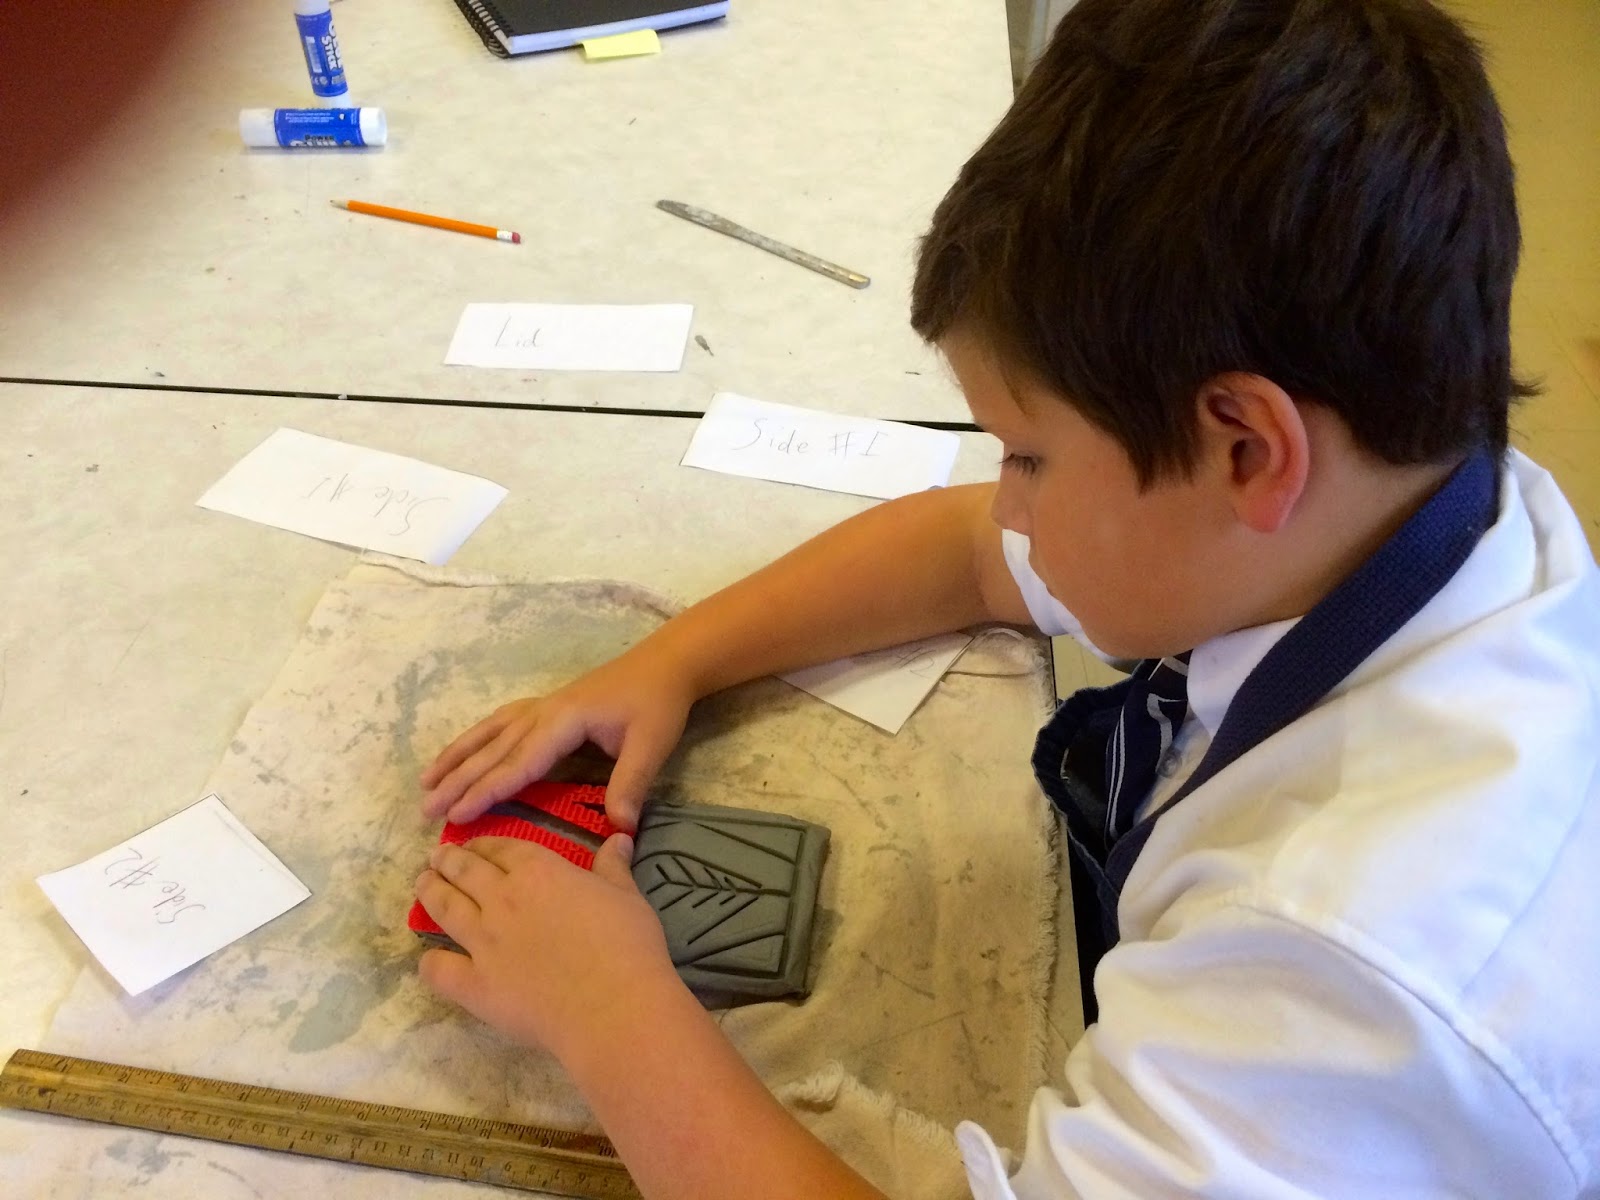
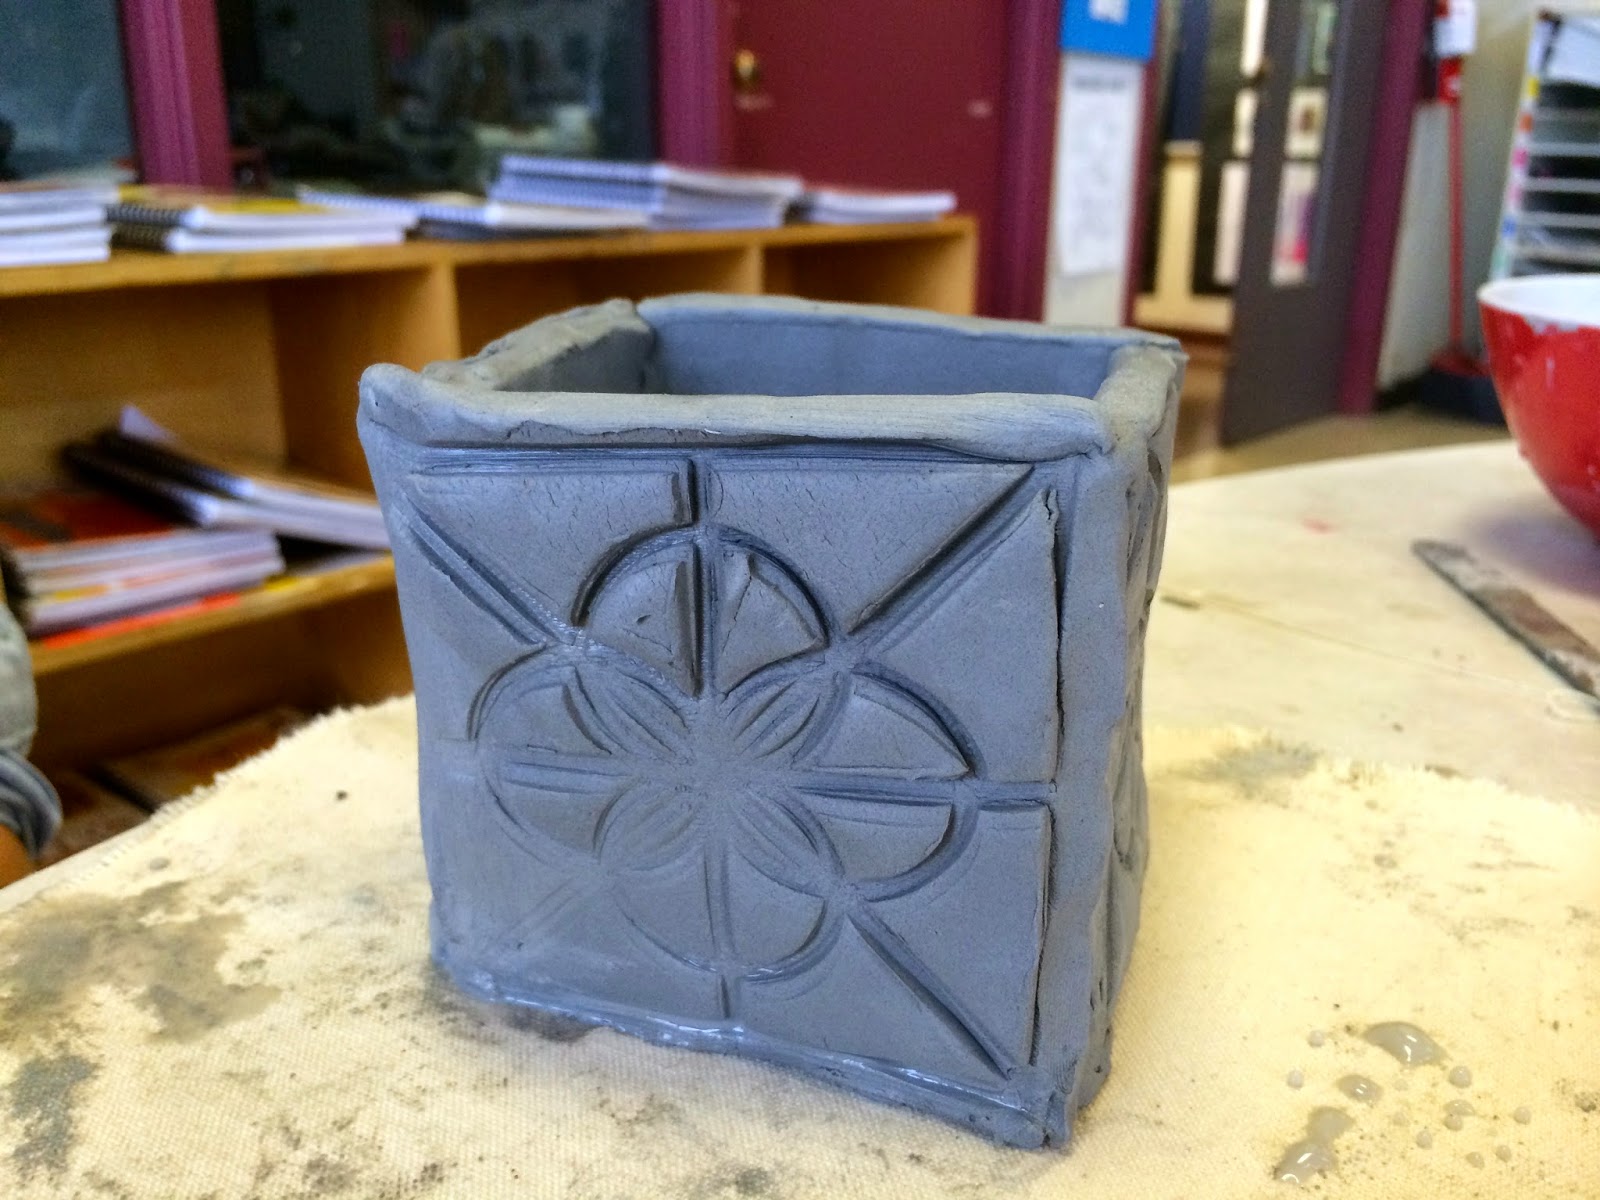
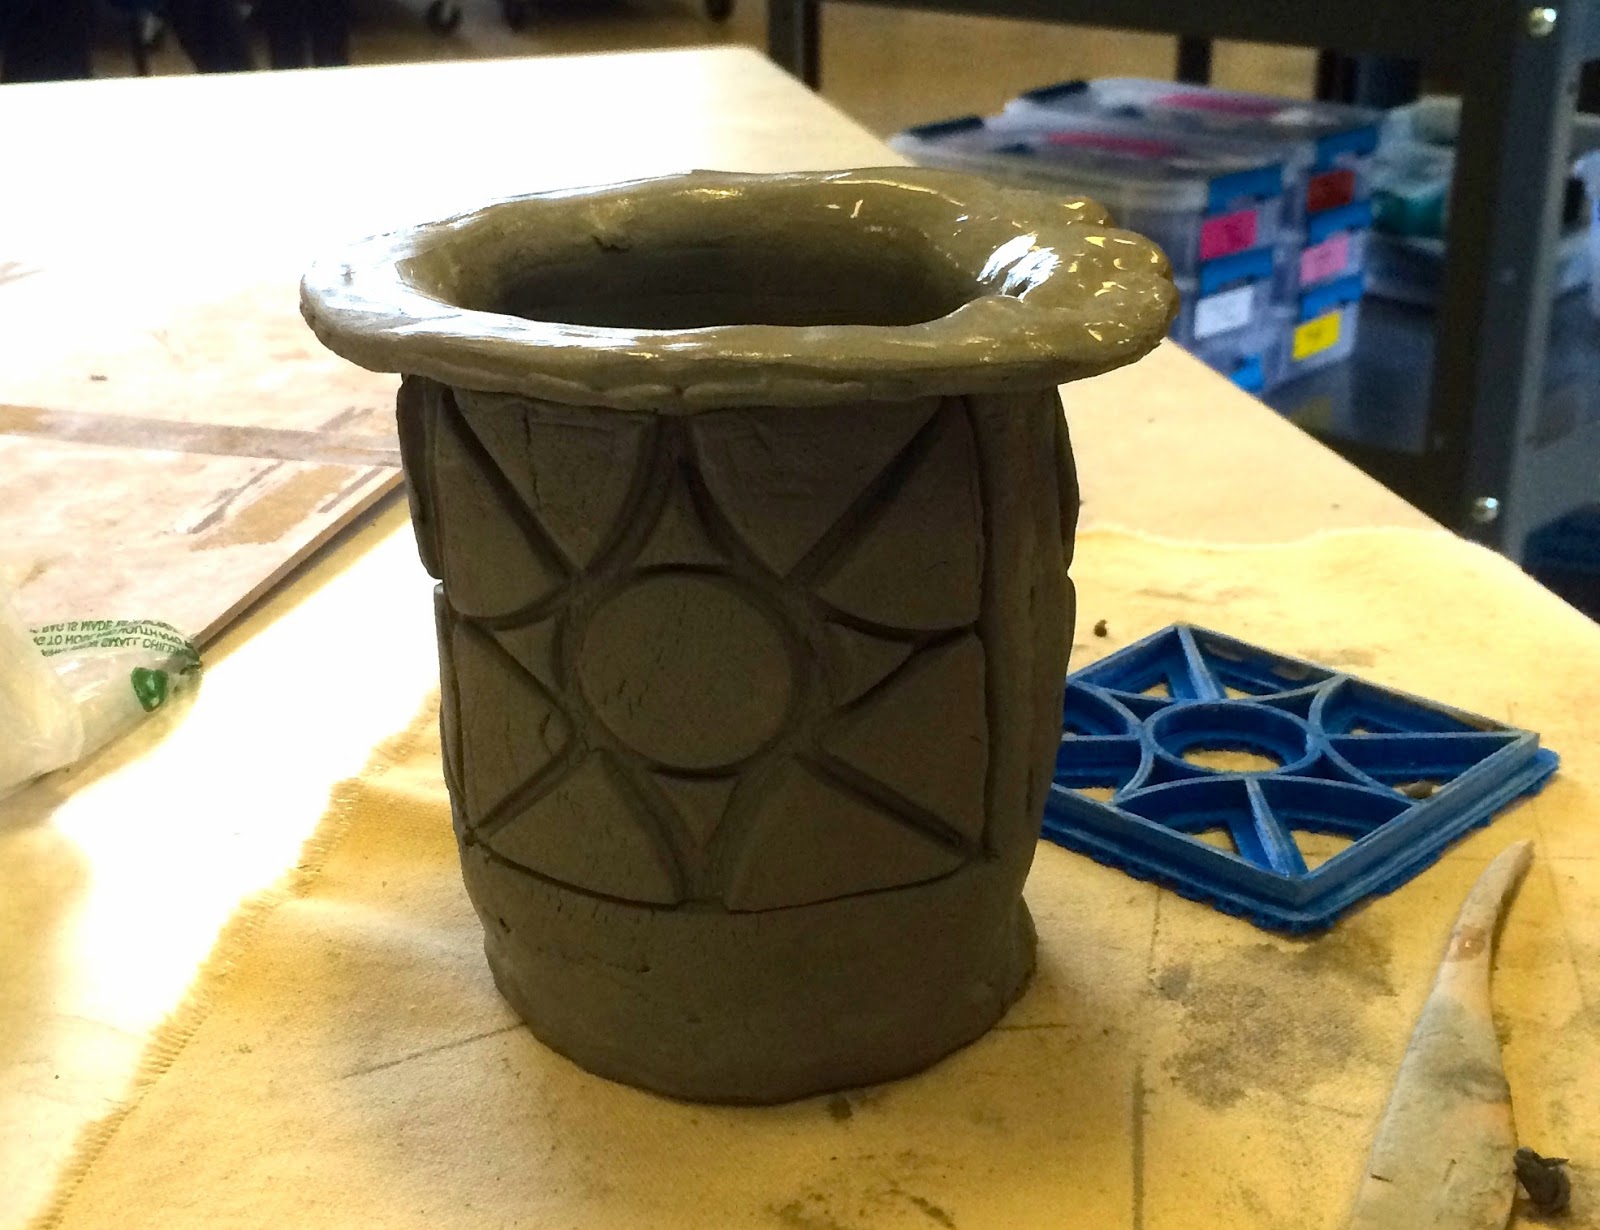
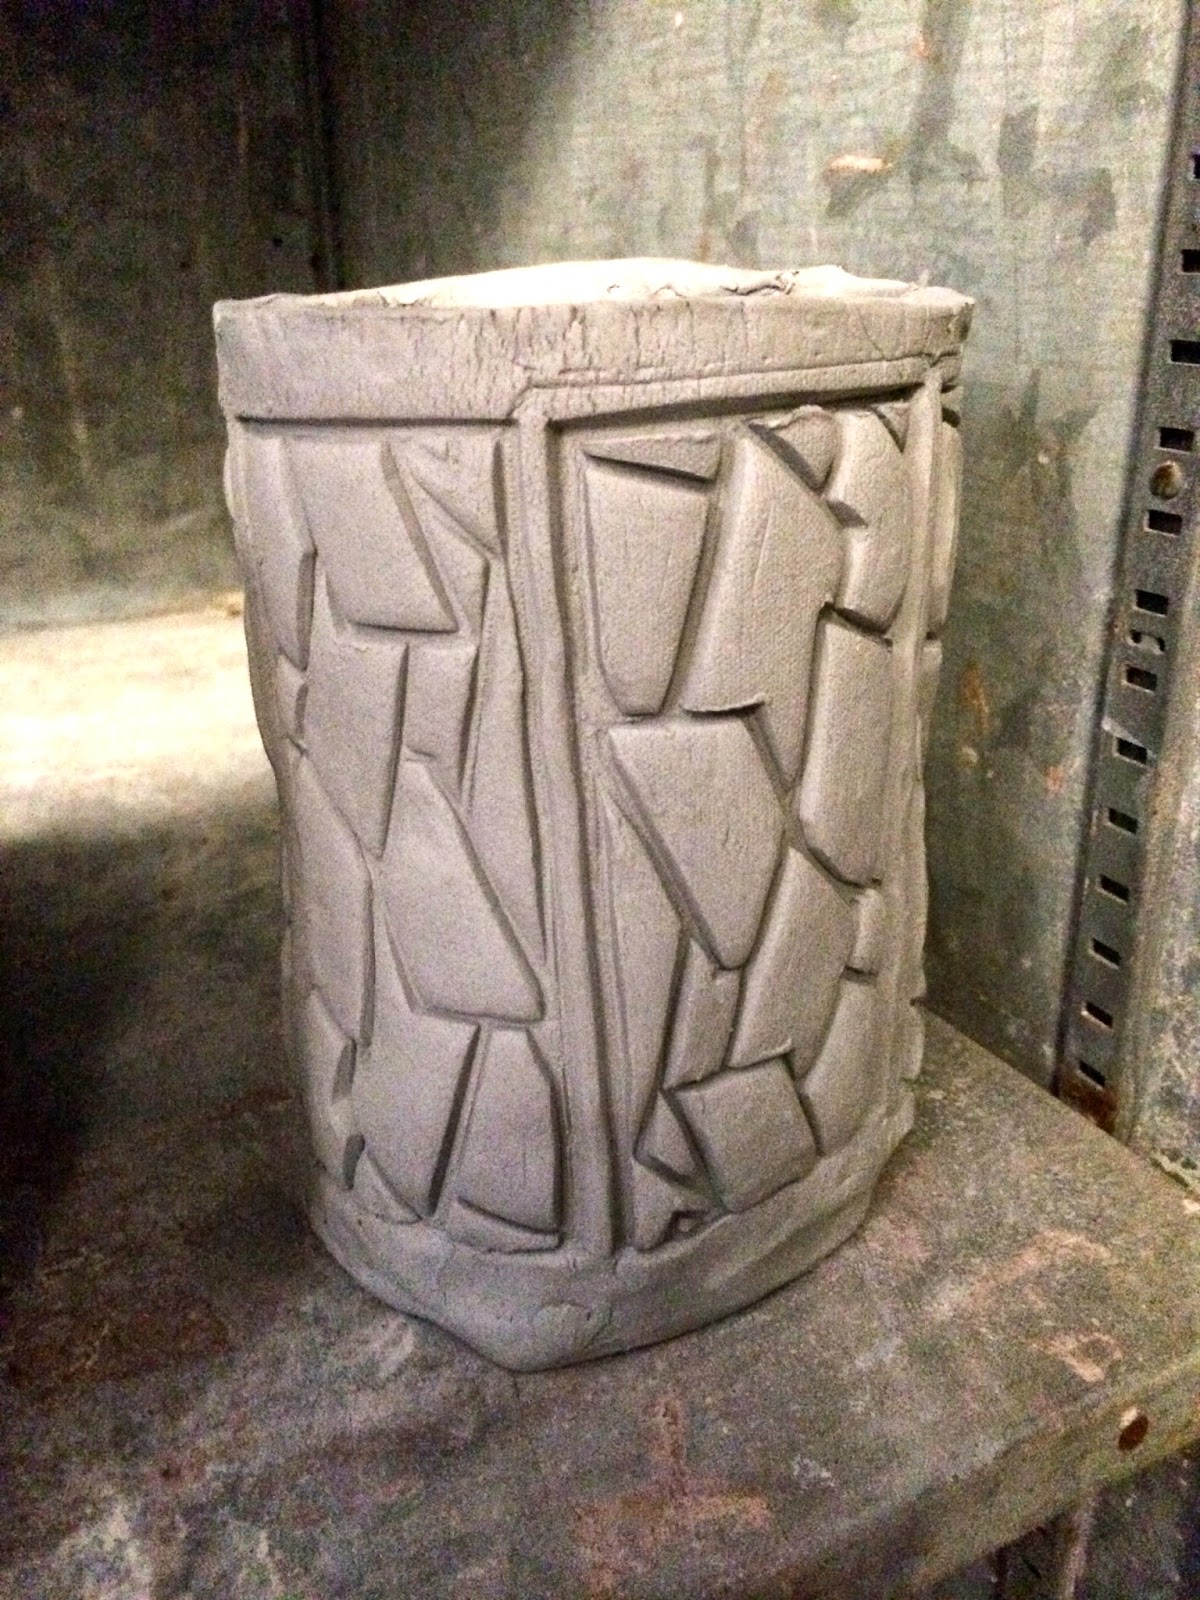
Once they were ready to put their containers together, their stamp came into play. Working carefully, each boy used their own designed stamp to add their design to the clay.


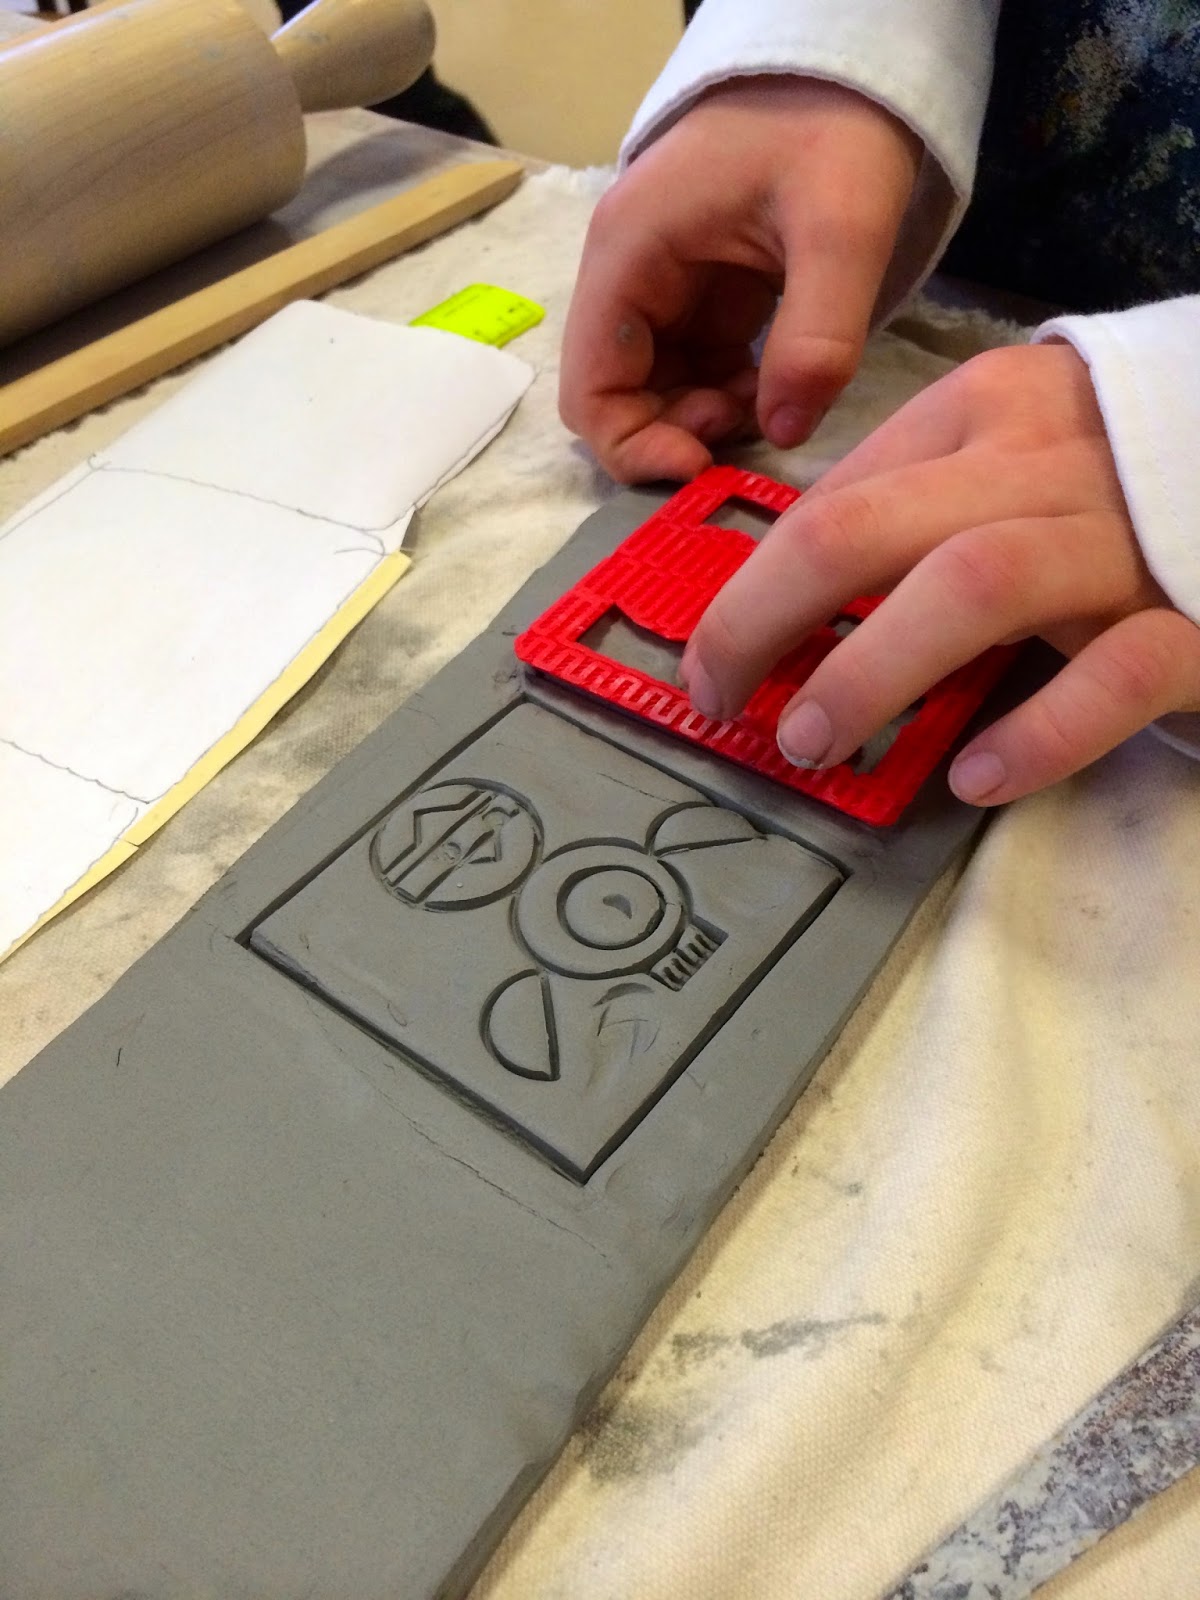
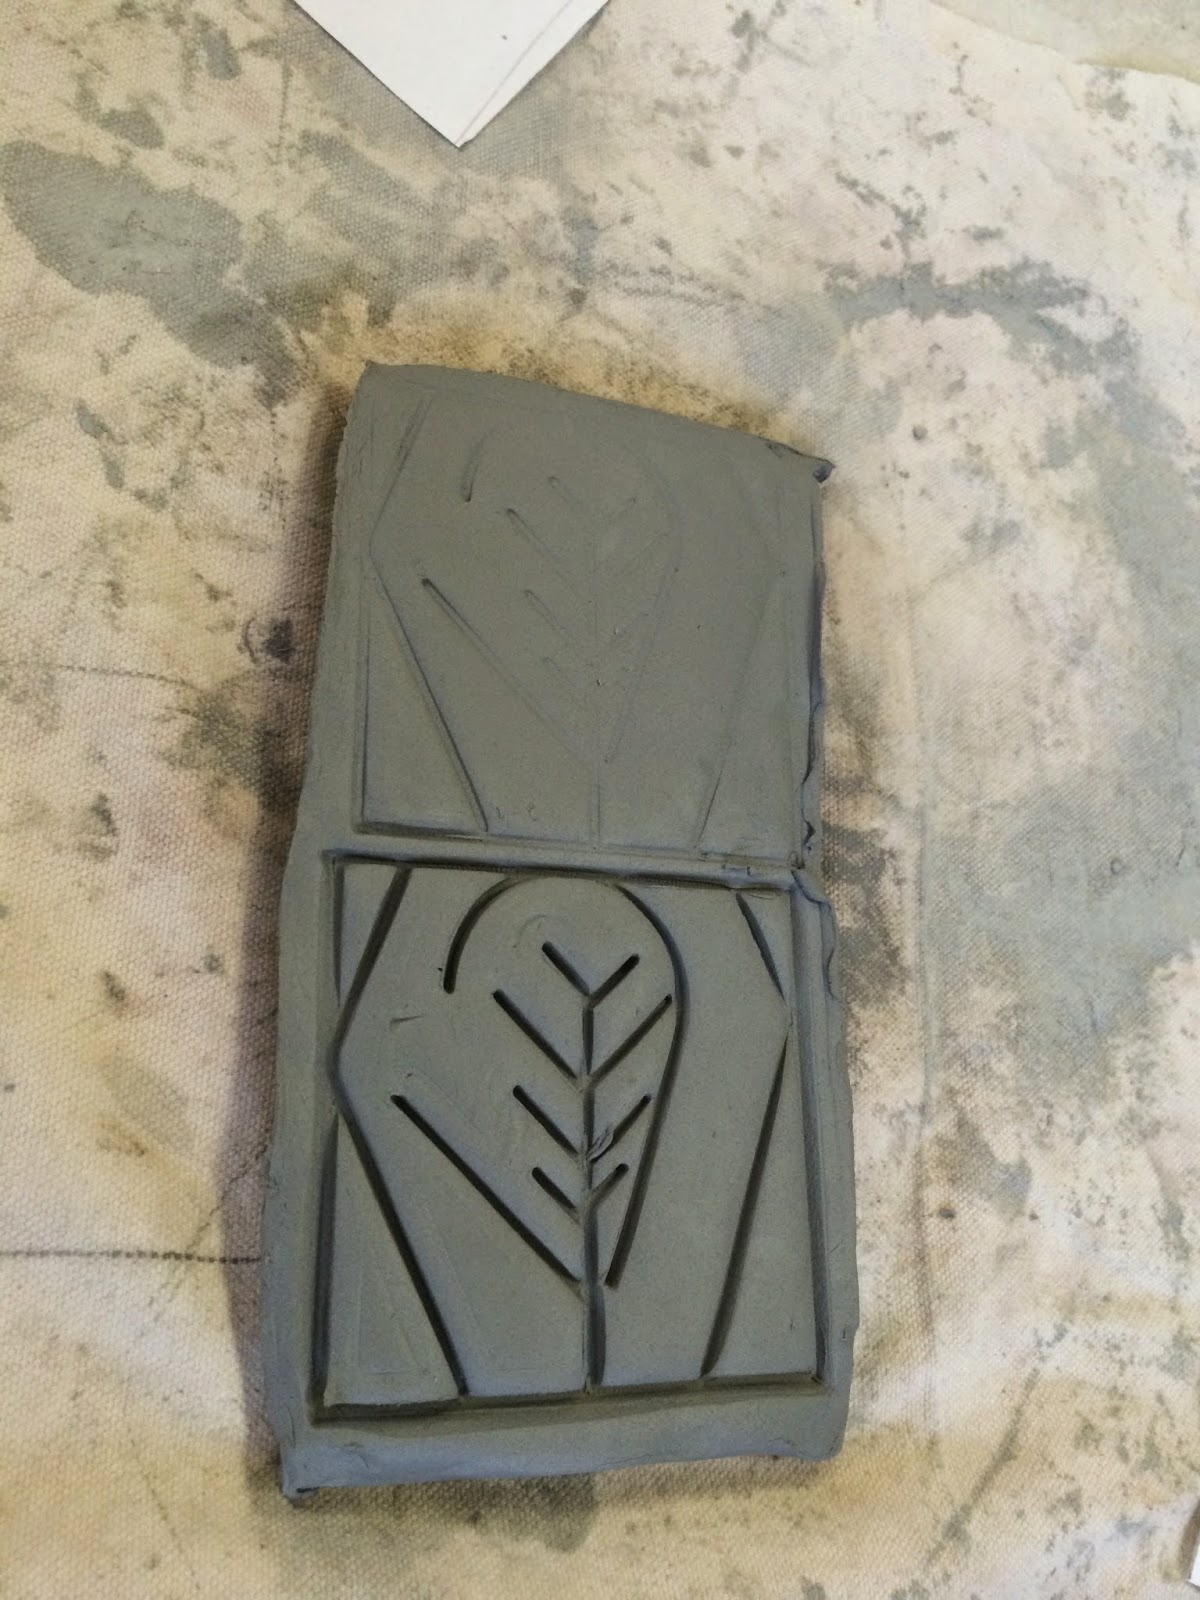
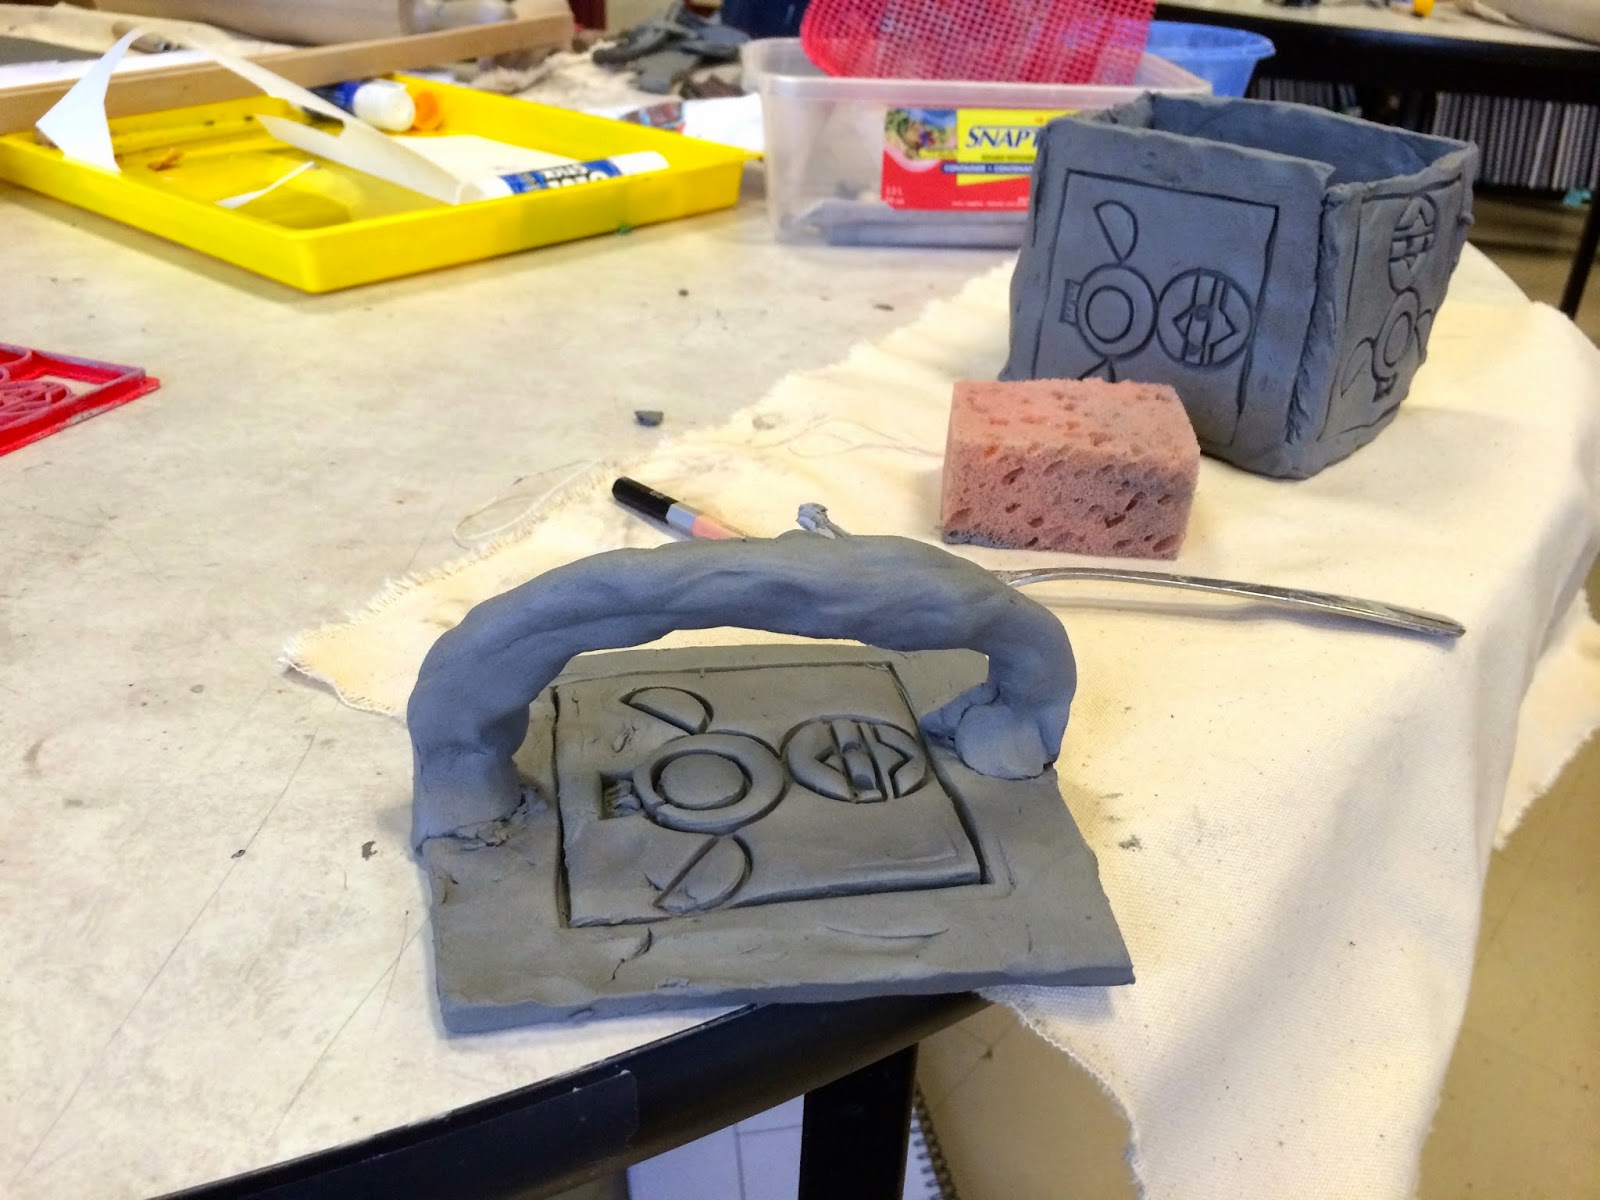
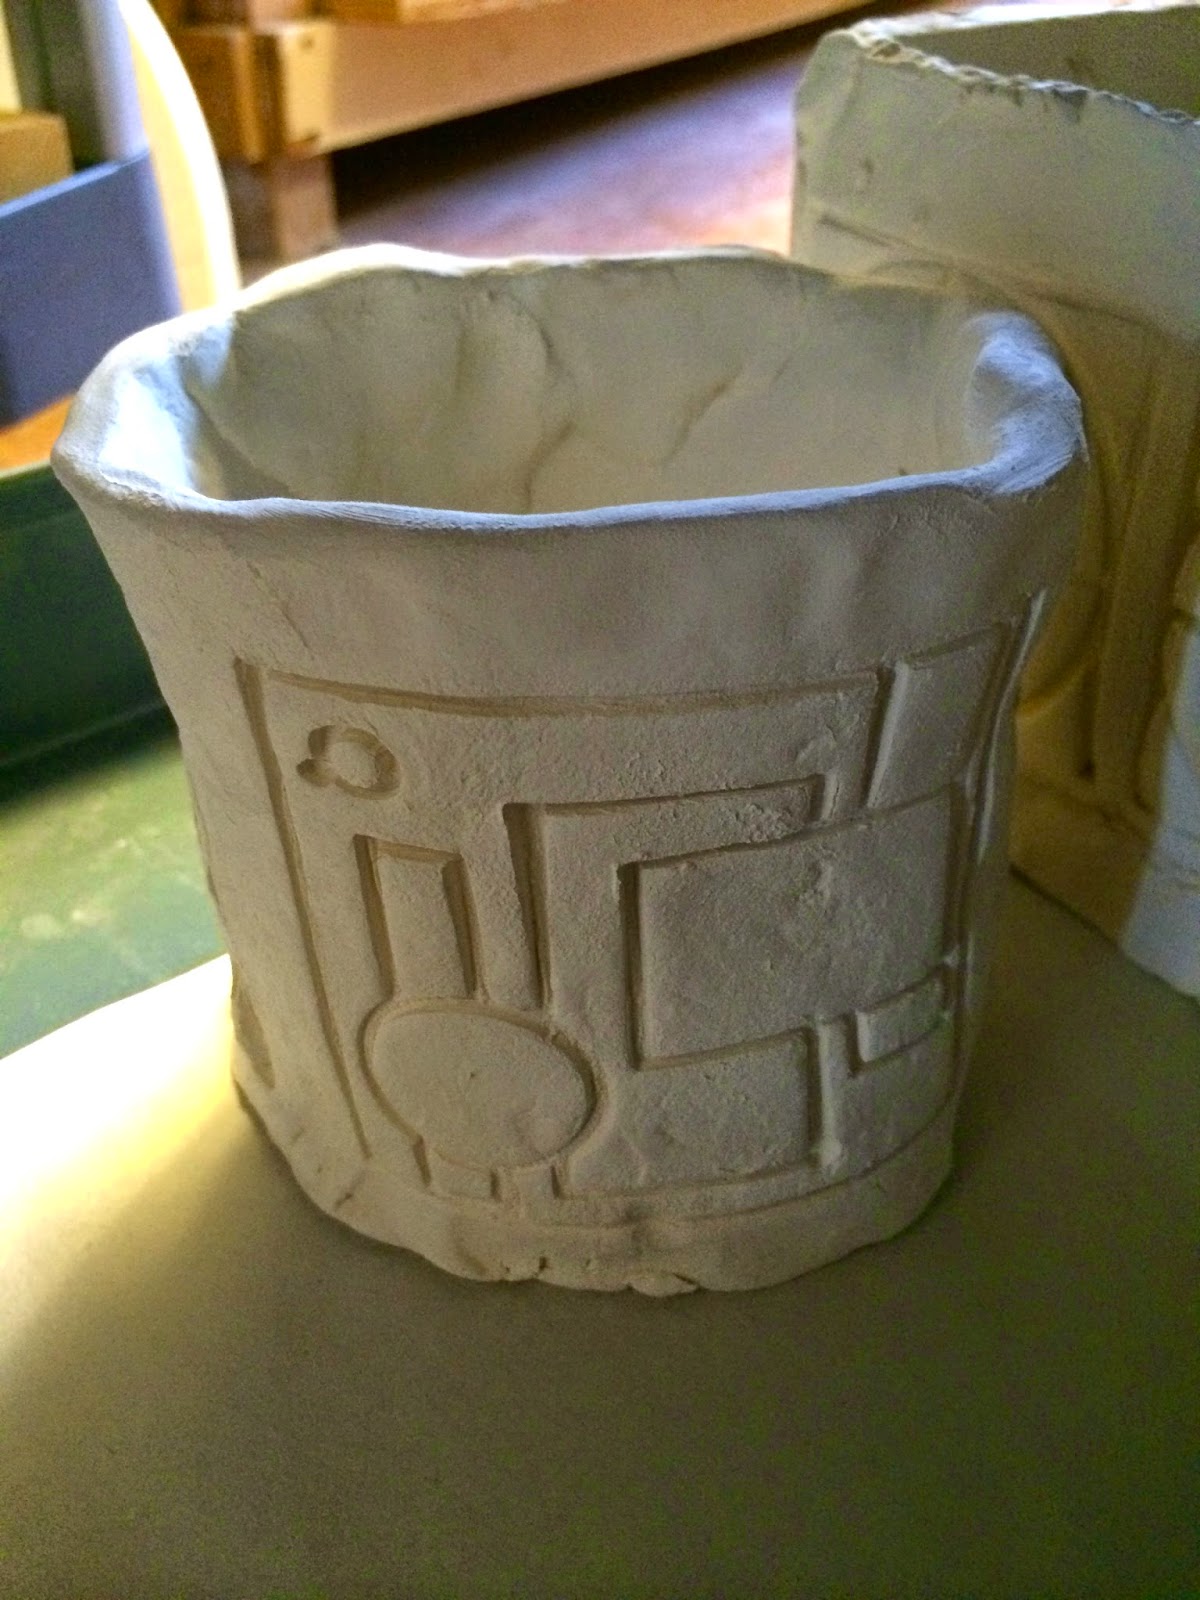
The next step was to take their stamped clay and form it into the container.


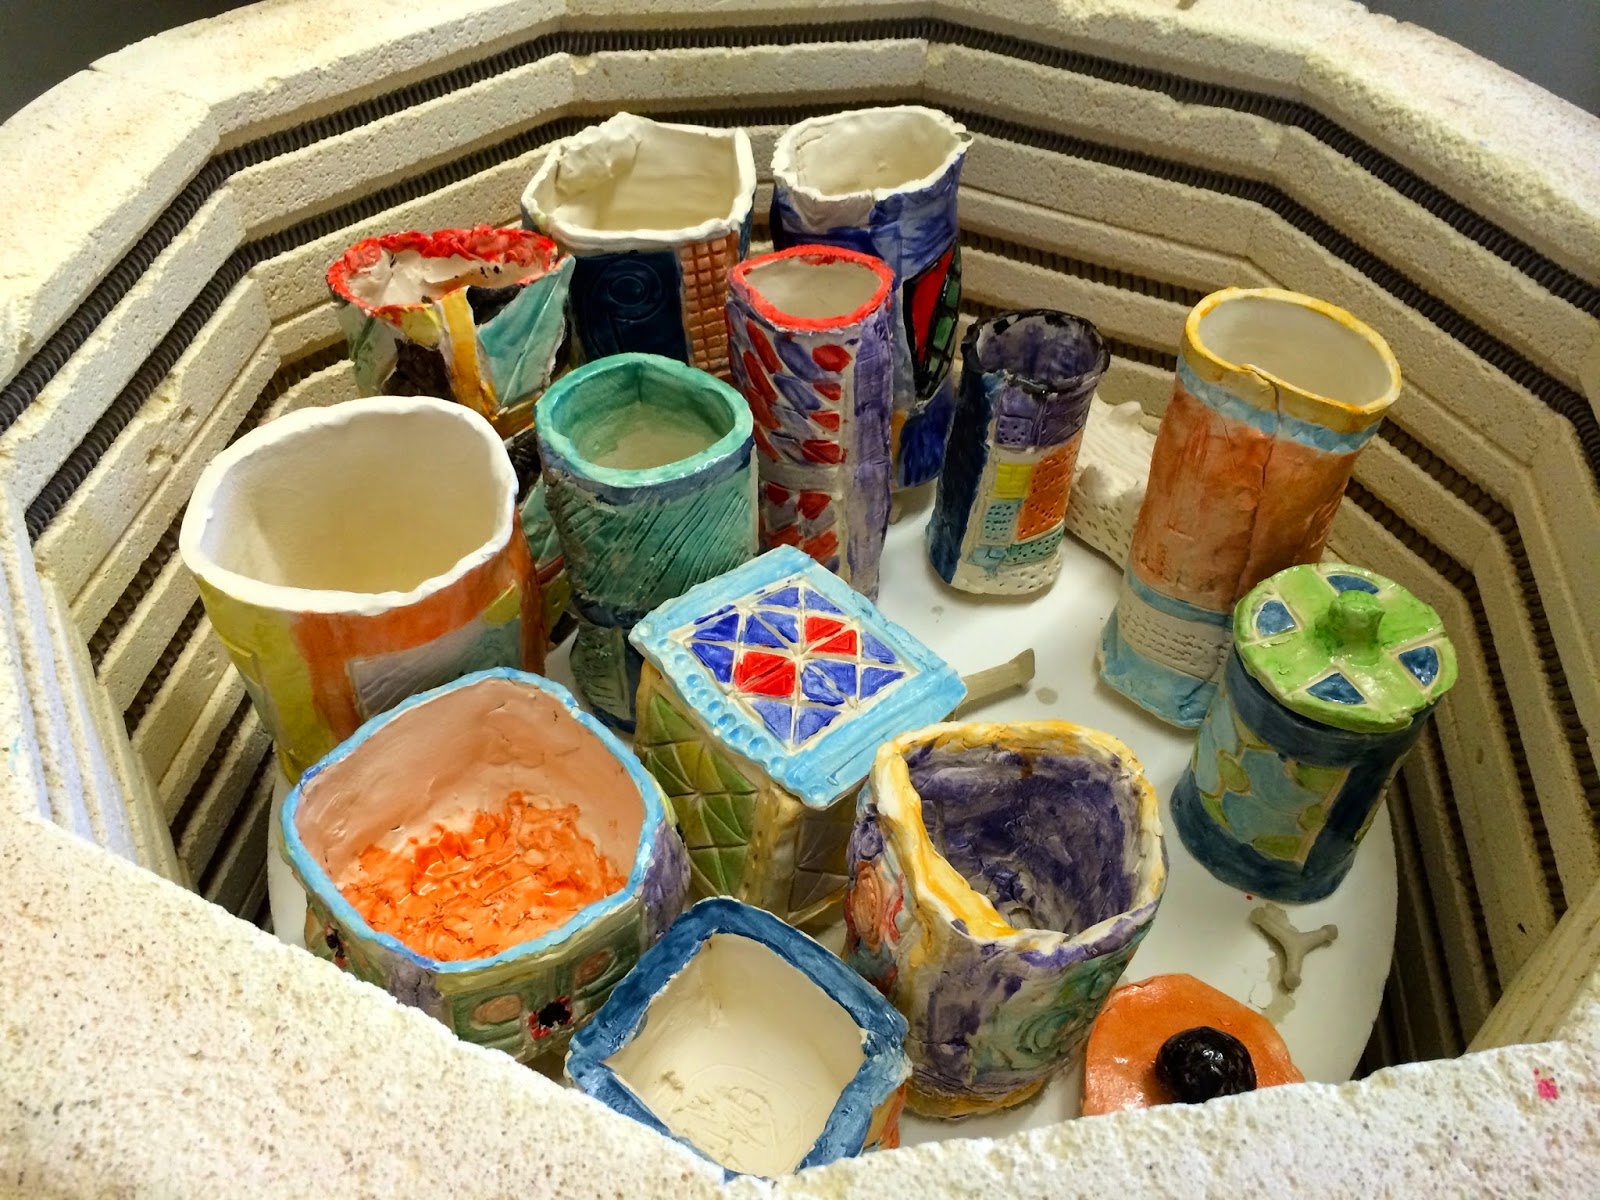
The boys now had to wait while their containers dried slowly over two weeks so they would not explode in the kiln. Once in the kiln they were fired for 24 hours. 


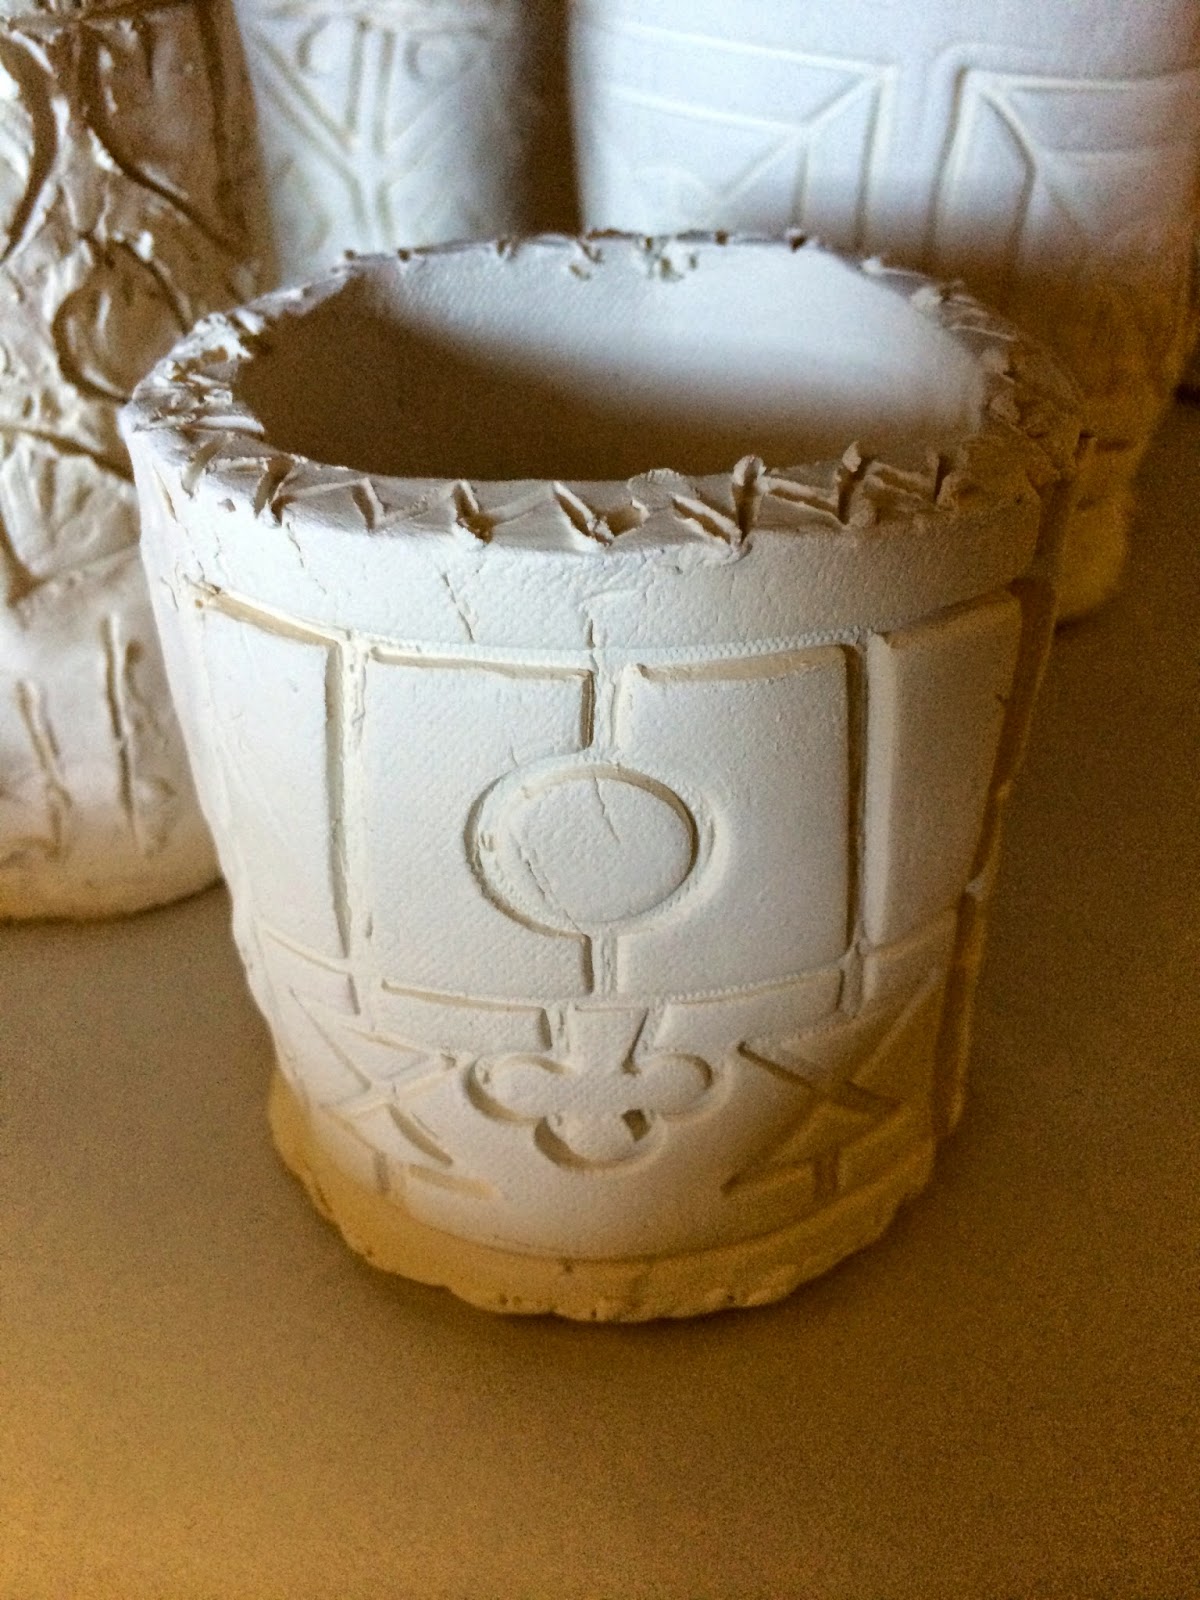
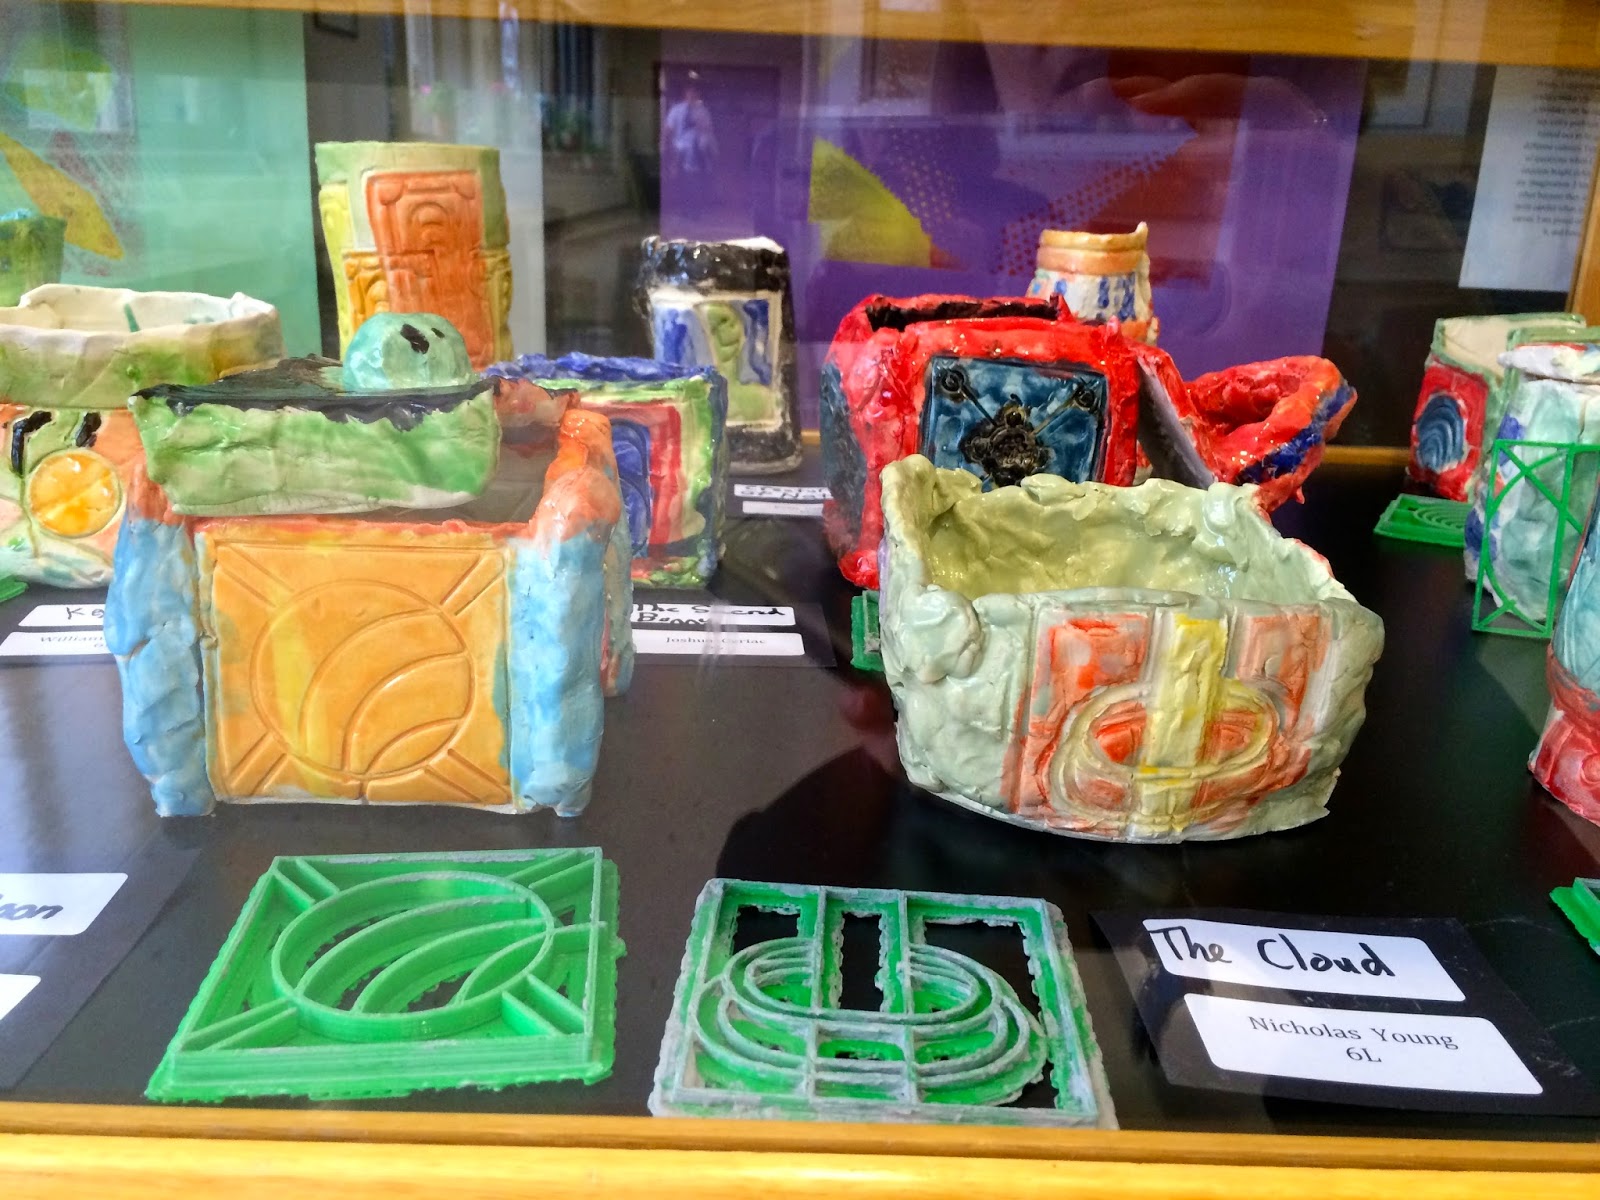
The final step was to add coloured glaze and fire their containers for the final time. The boys were amazed that they had created every single aspect of their container! What a creative process for them to have completed and the final products were outstanding!


 Enjoy! 


Wednesday, January 14, 2015

Going Google

Students in Forms 5-7 have been using Google for the last couple of years to save all their files with much success. It is a strategy that will be very helpful for teachers when we migrate to a new laptop in June. If you have not already "gone Google", here's an introduction into how Google Drive works: https://www.youtube.com/watch?v=BXEi1KbTyX8

In our faculty meetings we will be working together to make sure that everyone has been set up and is ready for their new laptops in June.


In case you miss(ed) the meeting, here are the general steps we will be following (notes are available in the What Is Google Drive link below the image):


What Is Google Drive? - Created with Haiku Deck, presentation software that inspires

Tuesday, January 13, 2015

BrainPop - HUGE Additions!


Have you used Tim and Moby in the past? They are now better than ever before.

BrainPop made huge modifications to their features last summer, and I have finally had a chance to get in and explore. There is so much more than just videos and quizzes now. Here is a quick overview.

For Students

You can see the extra features below any movie. In addition to the original quiz, there are so many more options. Not all of these options exist for all topics, but most do:
  • Activities - these vary depending on the video, but there are often several for each topic. The Vocabulary activity allows students to research and write definitions for key terms within the video. Other activities include various graphic organizers, drawing, labeling, crossword puzzles, primary source activities and practice problems.
  • FYI - this section is for students that want to go above and beyond what is taught in the video - great extension material.
  • Q & A - common questions and answers for the topic.
  • GameUp - relevant and appropriate games that link to the material. A really nice feature of GameUp is that it allows students to stop the game and take a snapshot at any point. They can then add text to their snapshot to explain what is going on or what they plan to do next from this point in the game. Snapshots can be submitted to the teacher and can be used for assessment purposes.
  • Make-A-Map - an AWESOME mind-mapping tool that integrates the movie right into the map. The movie can play in the top corner while students make their map. If the student wants to stop the movie in a particular spot and add that to their video, they can! When a student drags a pre-listed concept from the left into their map, it links directly to that point in the video and will play within the map itself. Students can add their own nodes and label links to make it easily understood. These maps can be saved by students to be worked on later and submitted to the teacher at any point.

For Teachers

For teachers, there have been some major enhancements:
  • My BrainPop - we can now set up individual student accounts, enroll them in classes, monitor what movies and activities they have completed and have students submit work directly to the teacher. Students can submit many activities, game snapshots and quizzes directly to you. You do need a school code to set up My BrainPop - just ask.
  • My Mixer Quizzes - you can now create your own quizzes! We are no longer bound to the 10-question multiple-choice quiz that BrainPop has designed. You can create your own quiz from a huge question bank (from BrainPop and other users) including multiple choice and open-ended questions, design your own questions, or a combination. The quiz results are viewable by the teacher and are summarized for quick assessment of understanding class-wide.

Next Steps

If you are interested, let Sarah or Lara know - you will need the school code. We're happy to show you how it all works and help set up your class with individual accounts. If you want to do it on your own, the support materials at https://www.brainpop.com/educators are excellent. In particular, the following sections are a great place to get started: